Adjust the settings to your needs and export the track.
Step 2 – Importing into UE5
I already have setup up a basic vehicle game template I am using, if you don’t have any you can use the one shipped with the unreal engine or google up some tutorials, there are plenty.
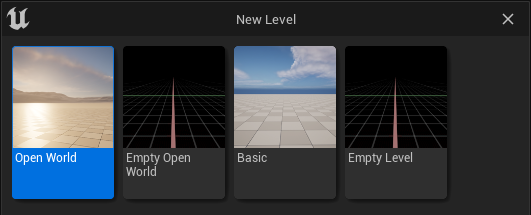
First a new level should be created, I suggest to select “Open World” or “Basic” – I used “basic” for the following steps.
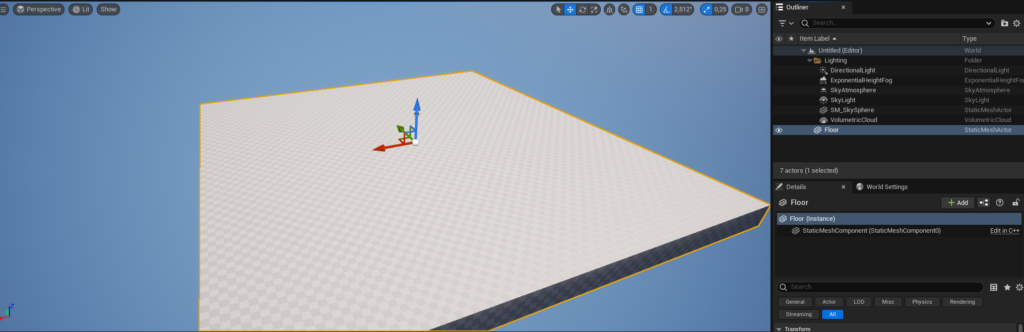
First of the floor static mesh (SM) can be removed as it is not needed.
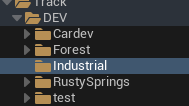
Second a new folder, according to your track, should be created – I chose “industrial”
Navigate inside that newly created folder and click on “Import” right above the content browser
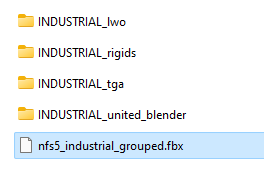
Navigate to the folder where you exported the .fbx-file to and select the correct .fbx-file, then hit “open”
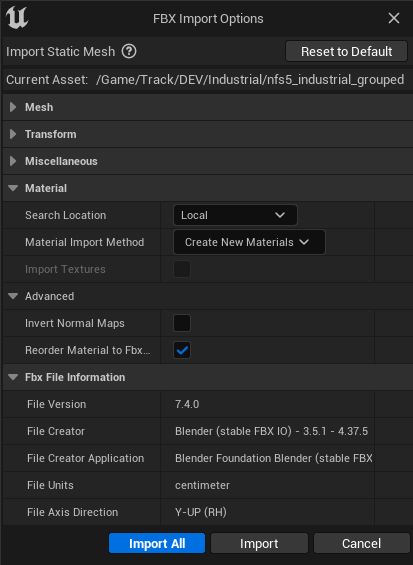
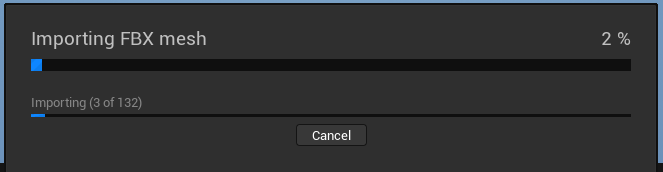
In the following dialog window make sure you have selected “Create New Materials” within the “Material Import Method” so that the engine is creating the materials for you. Then simply hit “import” and sit back and wait.
This may take a while depending on how many objects your imported track has. Once its done you will find the imported geometry (static meshes), textures and materials in your content browser
First, now you should hit the “Save all” button to save the level and all imported assets, that will make alot of perfomance difference.
Once the saving process is done you surely want to have the track in your level, right? Okay, gotcha.
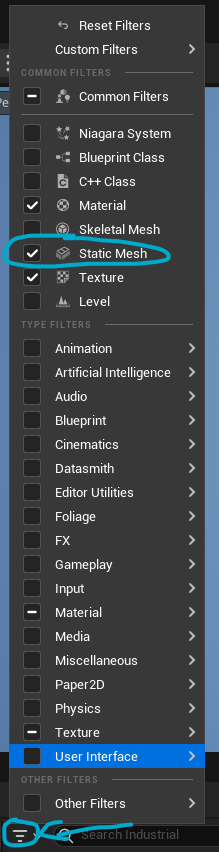
The easiest way is to apply a filter to your working folder, filtering for “static meshes” because within the whole texture-material-static-mesh-mess you simply don’t want to search for the SMs right?
Step 2 – Getting the track to play
As mentioned before, set a filter by clicking the filter-icon and selecting “static mesh”.
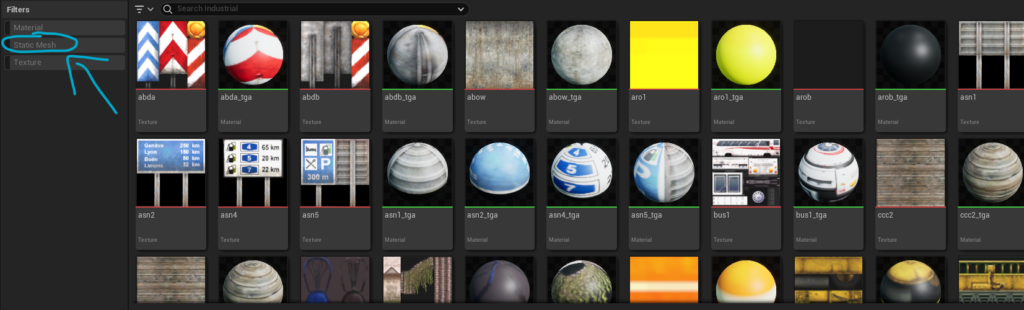
then apply the filter by simply clicking it on the left hand side (depending on your layout) of the content browser:
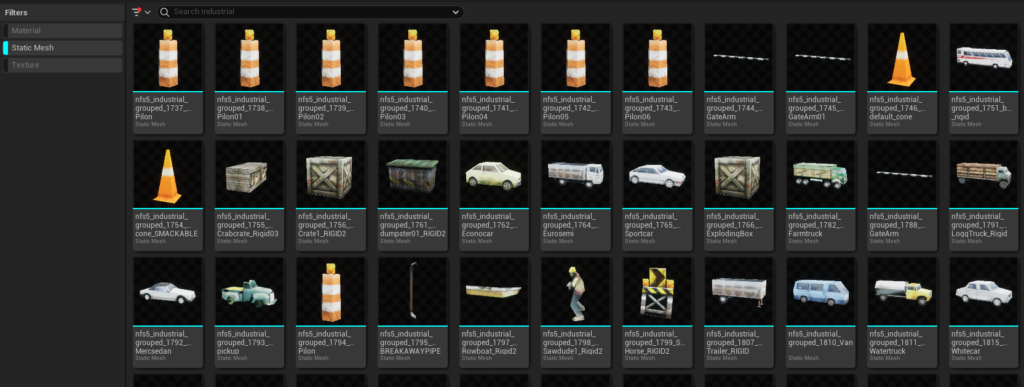
And all off a sudden you will see all the beautiful meshes you freshly imported, all textured and ready to use (the view might differ from mine as I sorted, grouped and united the track’s objects before to fit my needs)
Then all you need to do is press CTRL+A (to select all static meshes) and drag&drop it into the viewport above
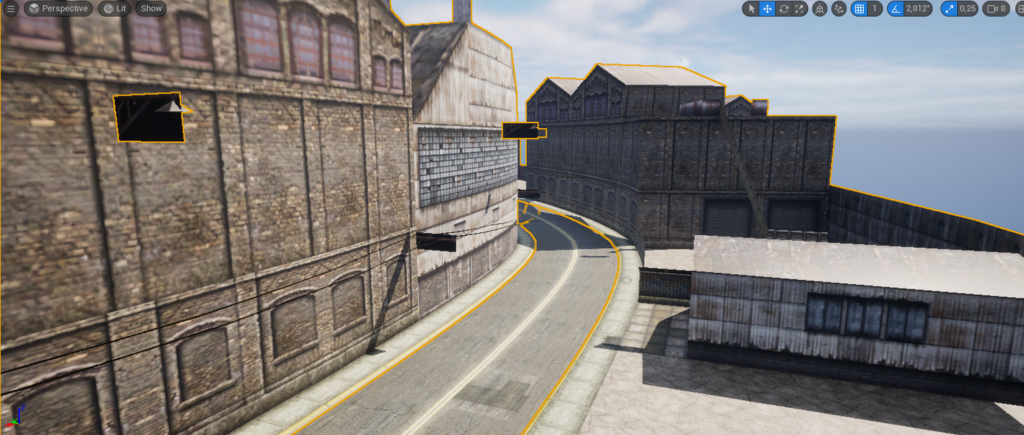
And you have successfully imported the track to the unreal engine 5.
Step 3 – adjusting the collision
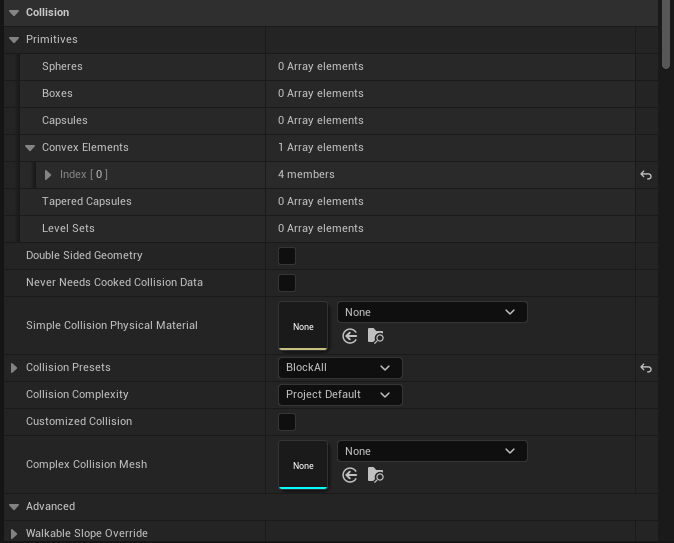
per default you would not be able to “race” the track right now as the collision settings would block you to do so. So the easiest way to adjust this is – as I do know you simply want to RACE THE TRACK – open the static mesh’s properties (one by one, by simply double-clicking it) and go to the collision settings:
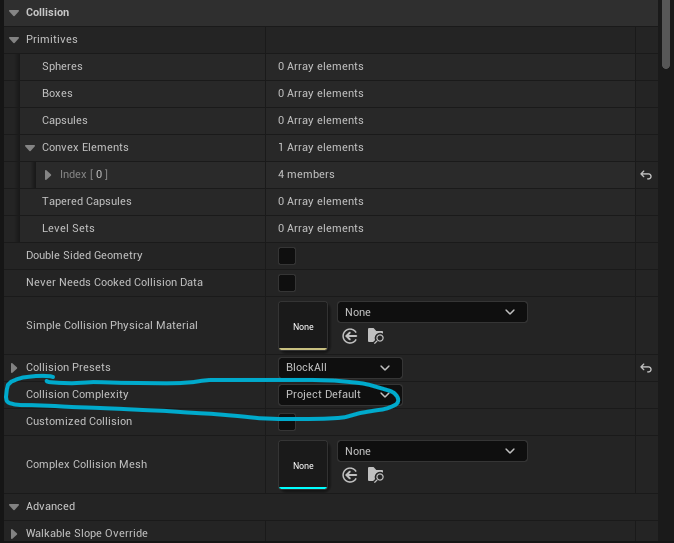
In there you will find the setting “Collision Complexity” – just set this to “use Complex Collision as simple”
This will force the engine to use the mesh of the static mesh as a collision instead of creating a basic box around it – to make the difference clear on a smaller mesh you will see both, simple and complex collision on the following mesh:
green being the simple collision, turquise being the complex collision. In this case using simple collision would lead to not being able to drive through the crane.
Make sure to hit the save button as changing the collision preset is not saved automatically!
Repeat this step for all needed objects (depending on how many you have)
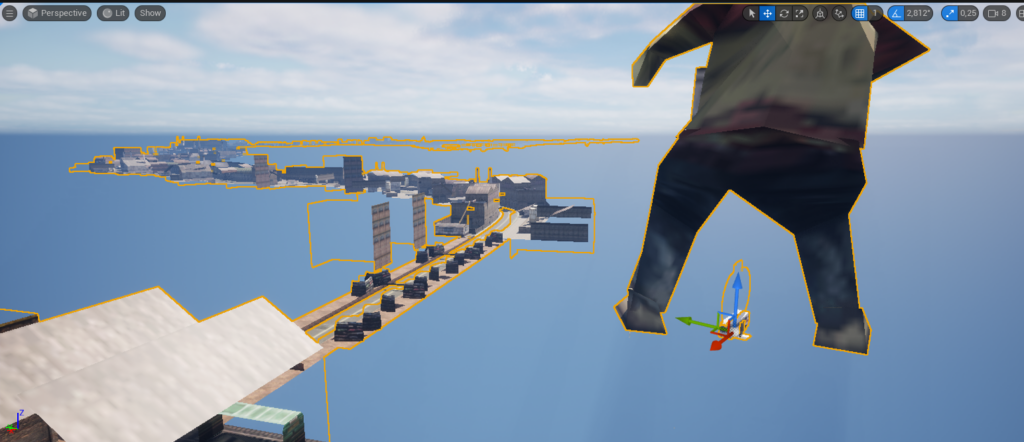
Step 4 – adjusting the size
This step can be very frustrating, but is mandatory. You need to get any reference point from the old game and transfer it to the new one to adjust the sizes – more or less, depending on how accurate you want it to be.
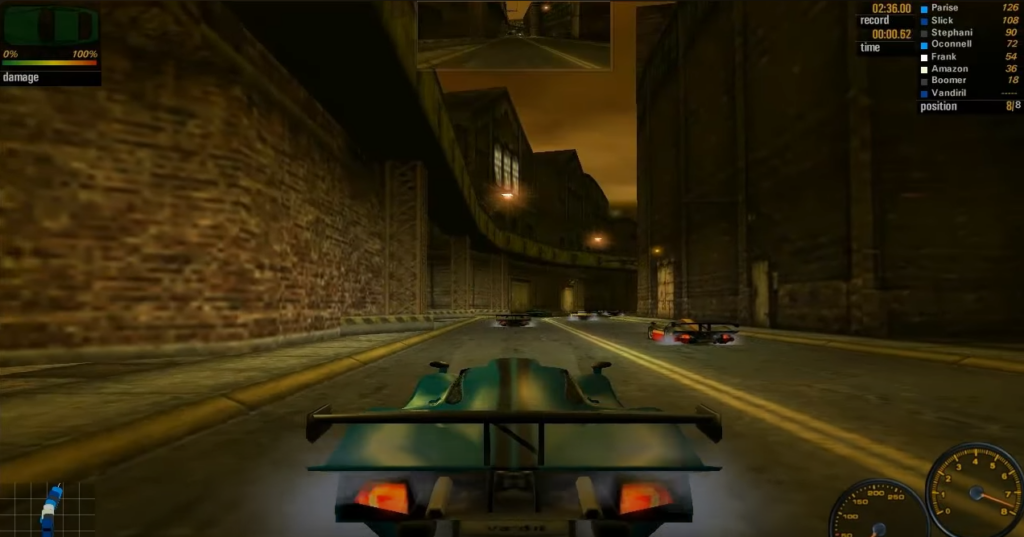
As I do not have yet a Porsche model ingame I am using the existing McLaren F1 as reference as well as some ingame shots from the original game.
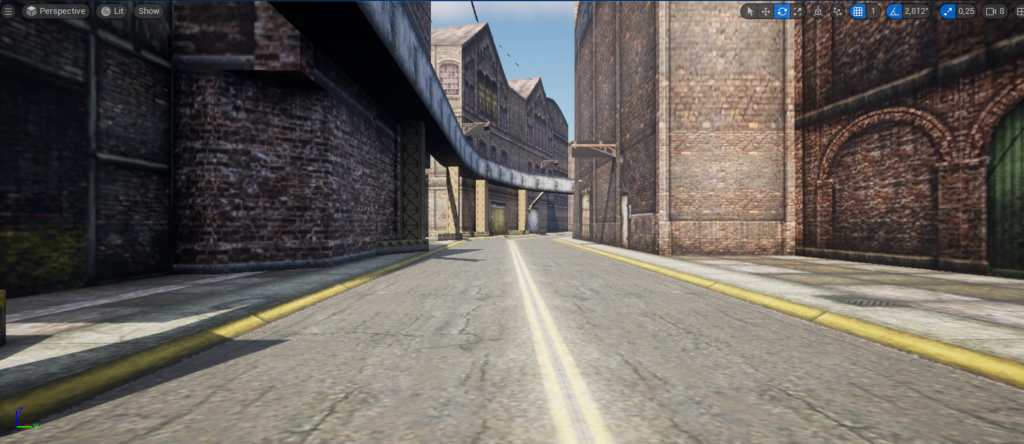
First we take a screenshot of the starting lane and find the same spot in the unreal engine project
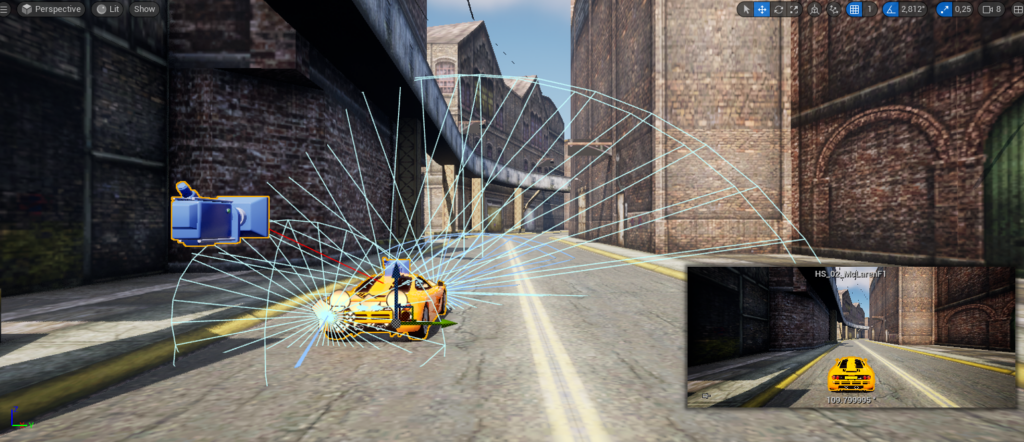
Once we found the spot we add our car as reference object
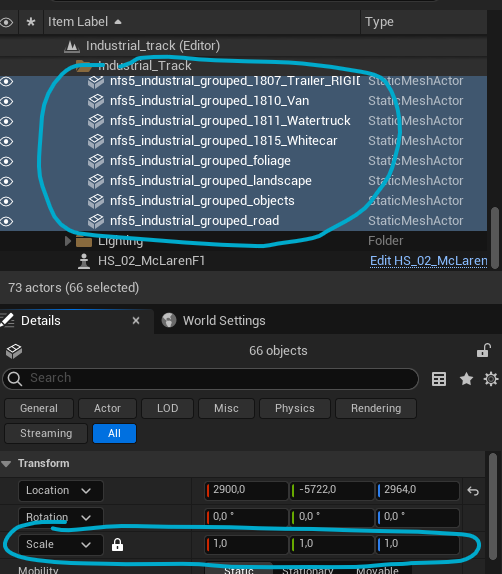
Now, for my good, it seems to be pretty well scaled. If you are not the lucky one to find the scaling right, just select all track objects in the level outliner (top right in the default layout) and adjust the scaling accordingly – attention, some math can be required (e.g. the original game screenshot car (911 GT-1 ) is 1990mm width, McLaren F1 is 1820mm width), so you could measure the actual ingame road lane width and transfer it to unreal engine using simple math.
Step 4 – adjusting materials
Gladly we have all needed materials ready, sadly they are all missing the alpha channel and, as the NFS5-Engine is dealing a lot of objects as two-sided, this setting is also missing and needs to be adjusted.
This is how to do it
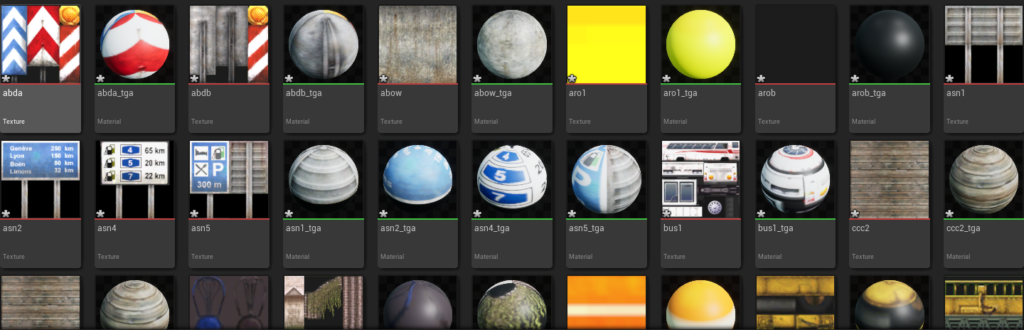
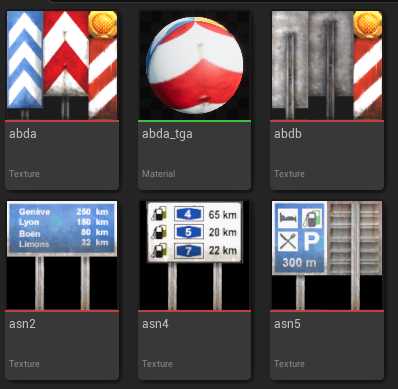
First, detect the materials/textures that have an alpha channel and/or are two sided, e.g. signs, trees etc.
those for example are pretty sure having an alpha channel
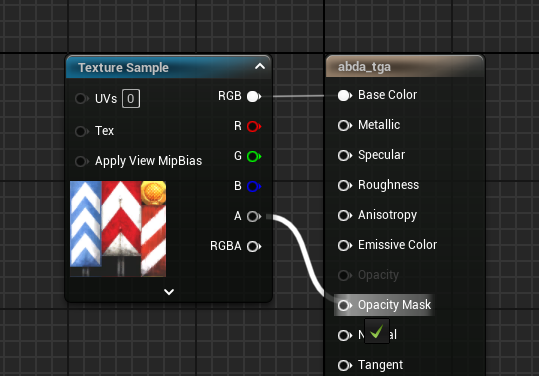
Once you find the texture/material, double click the material (NOT the texture). The editor will open a new window, looking like this
In here, left hand side, change the “Blend mode” to “Masked” and check “Two Sided”
Then in the notes view you can now drag the A (for alpha) channel note to the opacity mask note
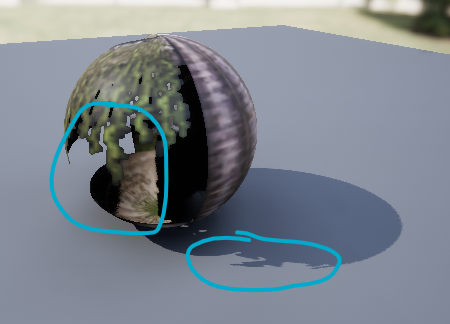
You will notice (depending on the texture) that there now will be transparent parts and the shadow will be calculated accordingly
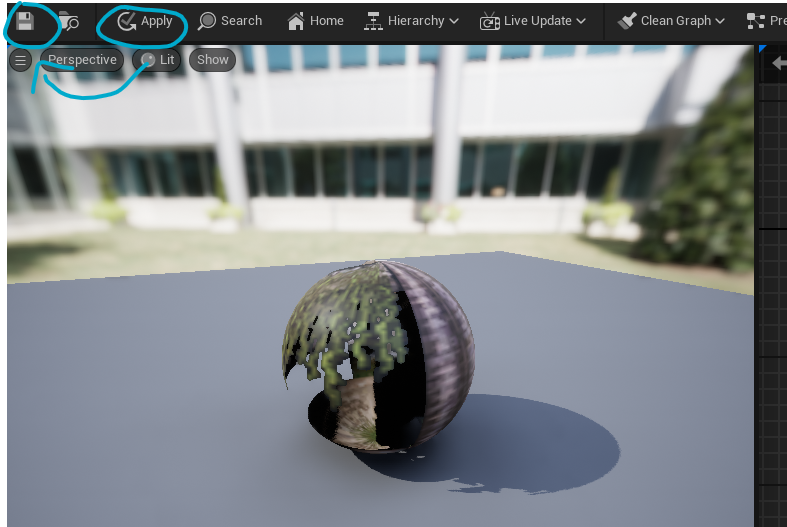
Afterwards always hit APPLY first, then SAVE
repeat this step for all needed textures/materials. Knowing the original track/textures does help as well as flying through the track in the engine.
Step 5 – adjusting lightning
Of couse you could race now, but as you are tend to get the atmosphere right we should adjust the lightning and atmosphere – using – again – old ingame references.
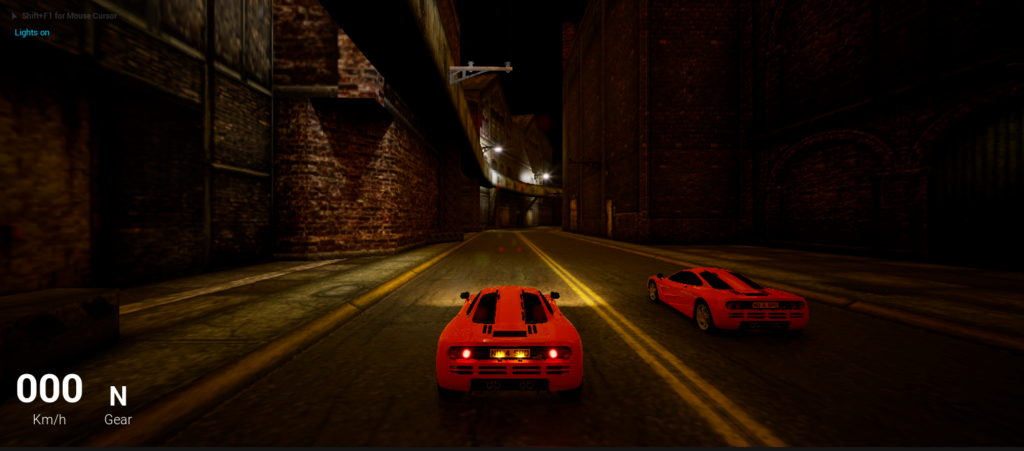
In this tutorial I show you the (for me, yet) best way to convert a track from NFS5 aka Porsche / Porsche Unleashed to a blender-compatible format.
First of all you obviously need a original copy from nfs5 pu for your pc. I will target the PSX version in another tutorial.
Futhermore you need the NFSPU CRP Track Converter (Credits to Denis Auroux, Bonne, Krom, Nikko, The Born, Addict) which you can download right here – and of course blender.
Note: yet I discovered some errors causing to blender force close on some converted lwo blocks, such as the two "waterfall" blocks on the "forest"-track.
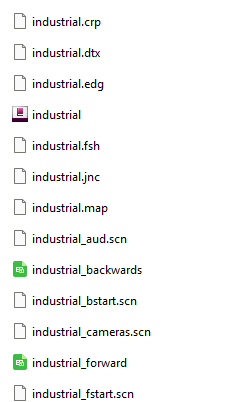
First of all you need to locate the desired track for conversion – in my case I chose “Zone Indutrielle”.
The trackdata can be found under \GameData\Track
To keep a better eye on the converted tracks and data I always copy the files to another location where I can better sort and store the track data, but that is totally up to you.
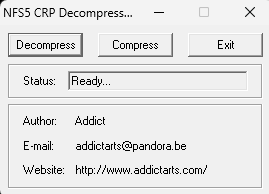
Step 1 – DRP2DRP
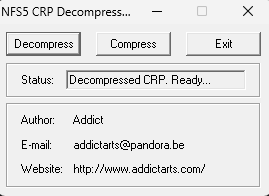
Shipped with the NFSPU CRP Track Converter Tool you find the crp2drp.exe in the main directory.
Once started you might want to select “decompress” and then select the corresponding .crp-file of your track.
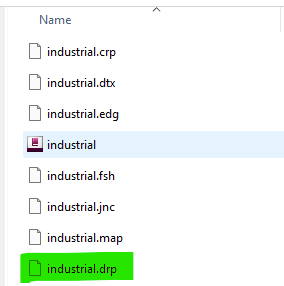
This will create a new .drp-file within the folder of which you started:
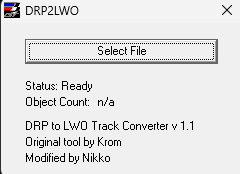
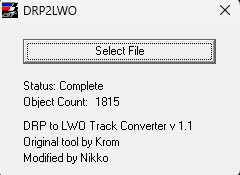
Step 2: DRP2LWO
Once we got the .drp-file of the selected track from the step above we now can convert it to .lwo file format. Again, shipped with the toolset you find the drp2lwo.exe in the main folder.
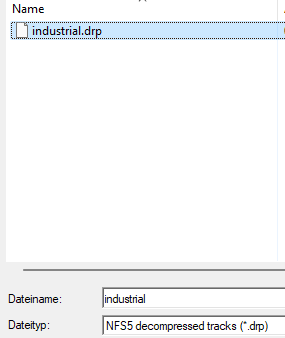
As easy as it could be you now just have to select the just created .drp-file
And need to wait a bit until it states “complete”
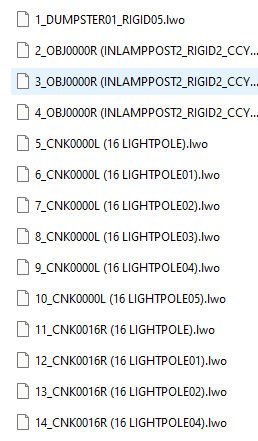
Then you will find a new folder, named after the .drp-file in the root folder where your track files are located. Inside you will find a bunch of .lwo-files:
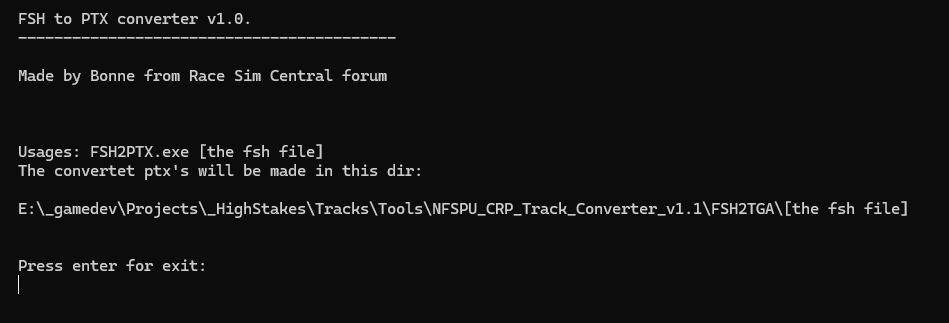
Step 3: Converting the textures
Before heading into blender – according to the guide shipped with the toolset – we need to convert our textures.
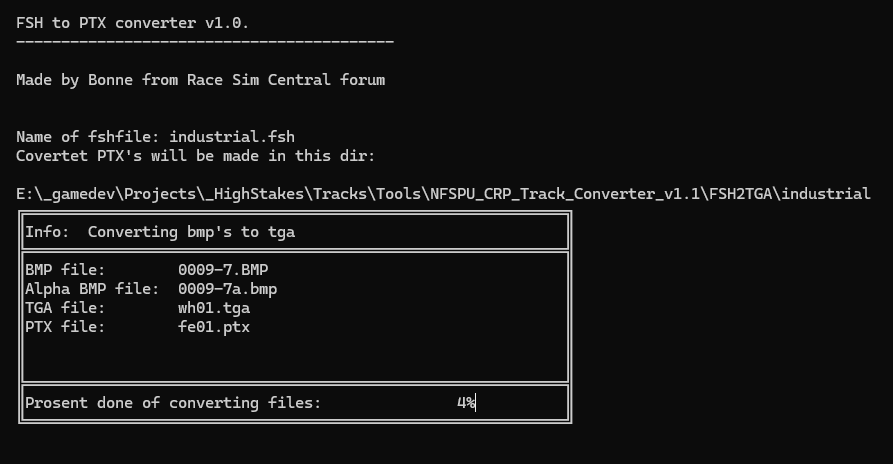
For this we find the tool “FSH2PTX” in the “FSH2TGA” subfolder of the toolset. This needs to be run via CLI/command line.
Also I recommend to copy the track’s .fsh-file (e.g. industrial.fsh) to the same folder of the fsh2ptx.exe
So the prompt would be
fsh2ptx industrial.fsh
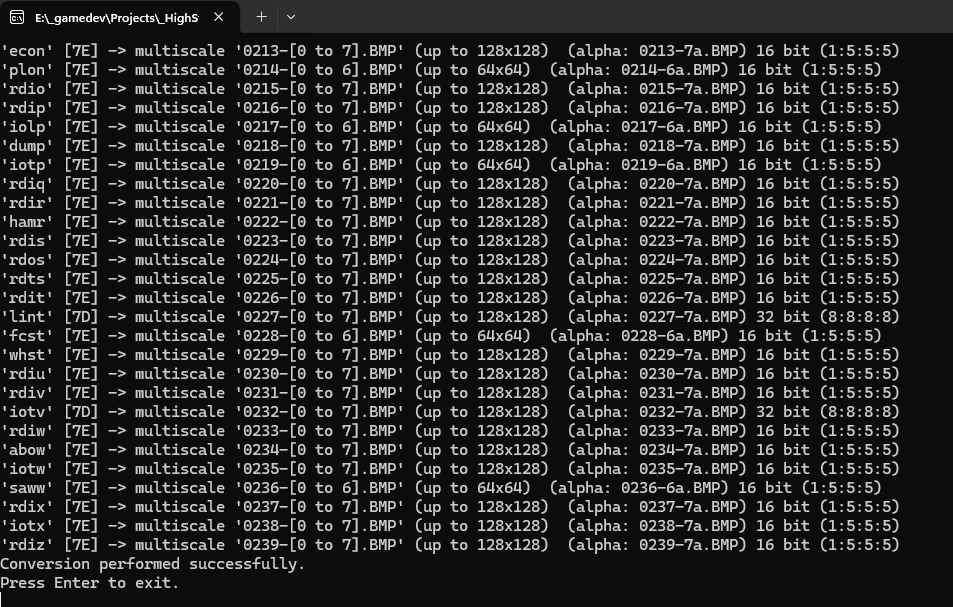
After pressing “Enter” the final conversion starts. This might take a while as there will be a bunch of textures converted.
Important: You need the .tga files - for me, for reasons I do not know, the .tga-files have been deleted once the process was done and only the .ptx files where left. So what I did was to wait until the very last image is successfully converted and then simply duplicate the folder
Once completed (and duplicated the folder at a 100% state), you can remove all .ptx-files as they are not needed, and that results in a folder full of .tga-files:
Again, following the guide, now you need to copy the “Unknown.tga” from the root folder of the toolset to the other track’s tga-files.
Step 4: Merging the folders
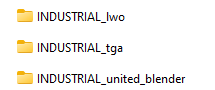
This step can differ as it depends on your working structure. As I, as stated before, work with separate folders for the converted track .lwo-files and the .tga-files I now need to join them in one single folder. I tend to call those folders TRACKNAME_united_blender for better identification.
Step 5: Installing the Plugin for blender
Now you need to install the “io_scene_lwo” Plugin into blender.
Step 6: Importing the files
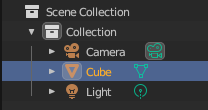
After launching blender, at first I recommend to remove the default objects from the scene at first so we have a clean start.
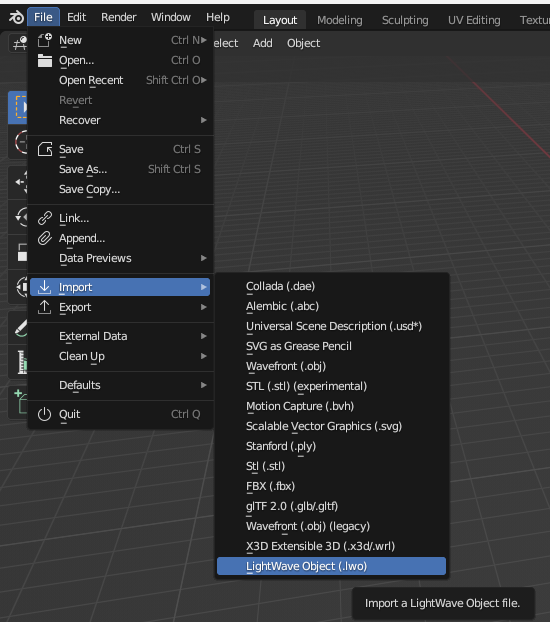
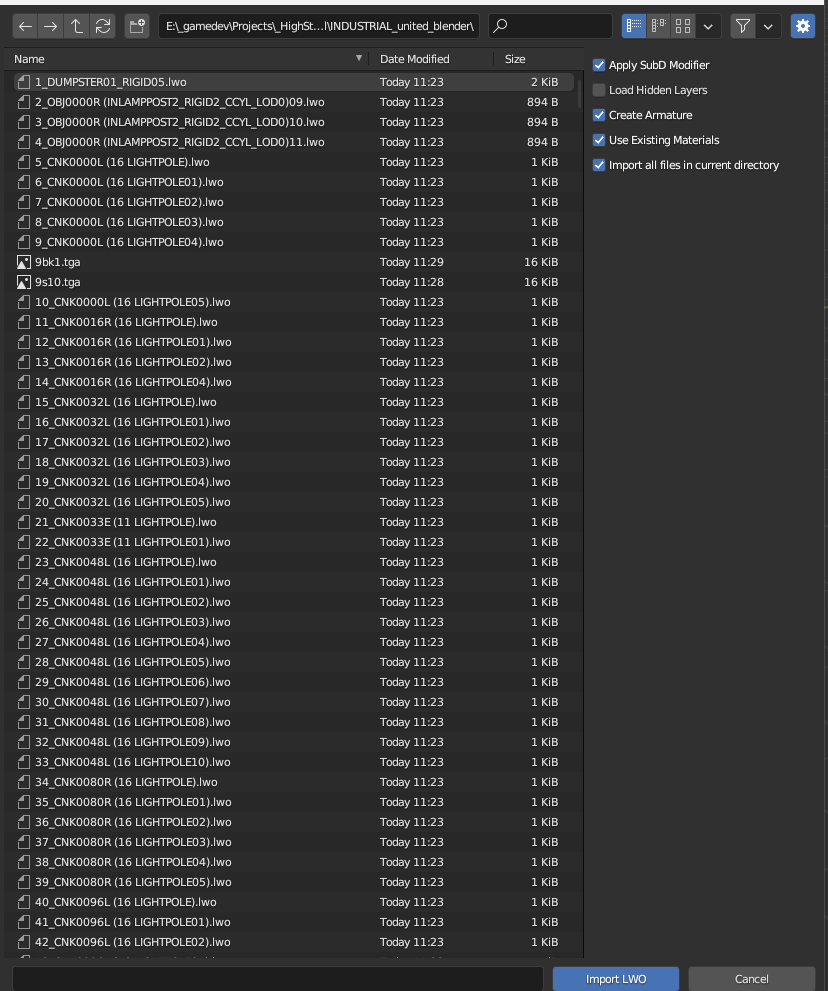
If you have successfully and correctly installed the “io_scene_lwo” plugin you can now find the lwo-import option from the menu under file > import > LightWave Object
Then navigate to the tracks’s folder you just created
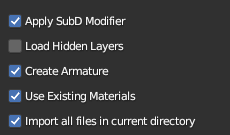
I personally recommend to check these settings
Breakdown of settings:
Use Existing Materials– as in the NFS universe a Block/LWO-File will have multiple textures assigned blender otherwise tends to create materials for each texture for each object imported, leading to easily over 5.000 materials for the scene. I tried cleaning them up, it was a pure mess.
Import all files in current directory – simply a pure time saver if you want to import the whole track at once. If you just want specific blocks this setting should be off.
Important: within the process I discovered some force closings of blender within the import process - yet I could strip this down to the following .lwo-blocks of tracks - removing (or leaving them out from import) prevented the force close to happen, yet it seems that animated water is tend to cause the problems here:
If you encounter a force close this will be caused by a single or multiple faulty blocks - I then start to import 100 files at once, save, and keep doing this until I reach the 100-block-set causing a force close and strip it down until I find the block(s) that cause the trouble. Mostly those blocks are only one or two, but finding them is kind of hard. Maybe you can reach out to the reNFS5 Project via Discord:
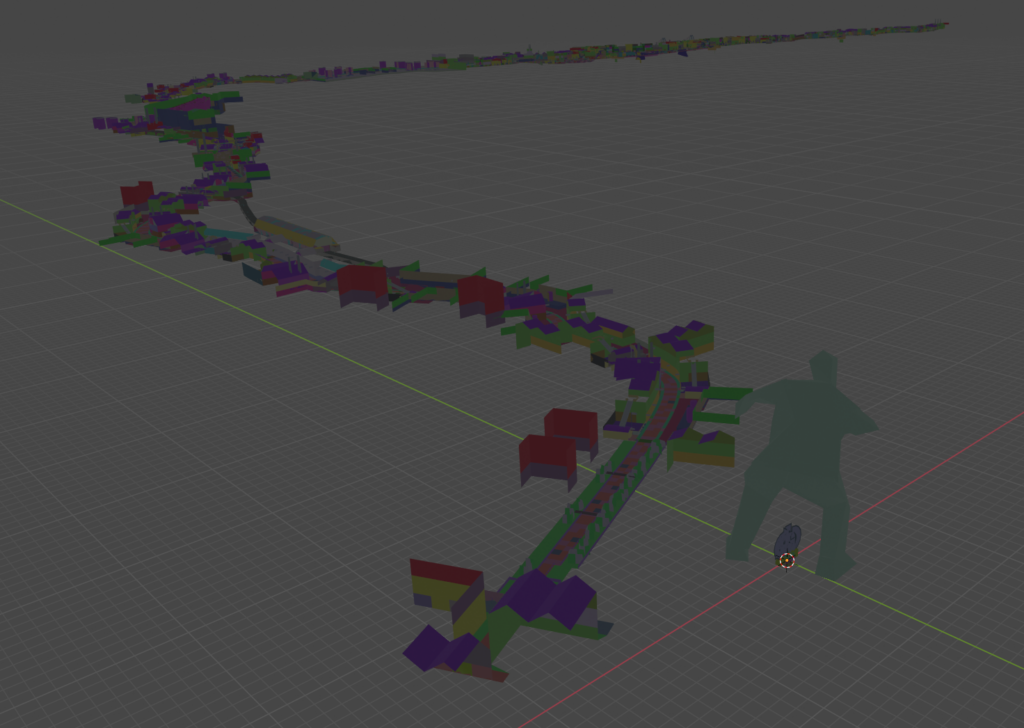
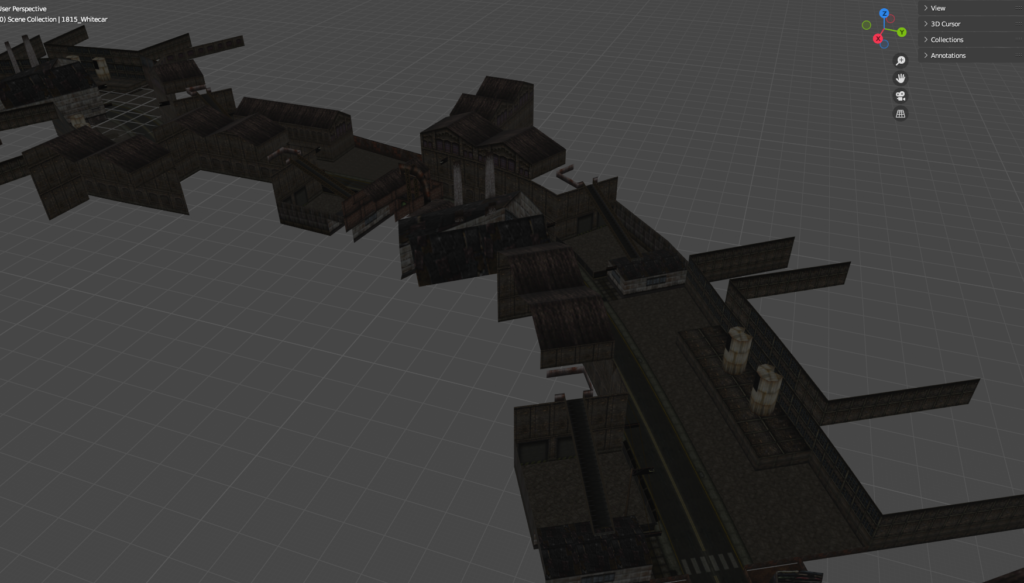
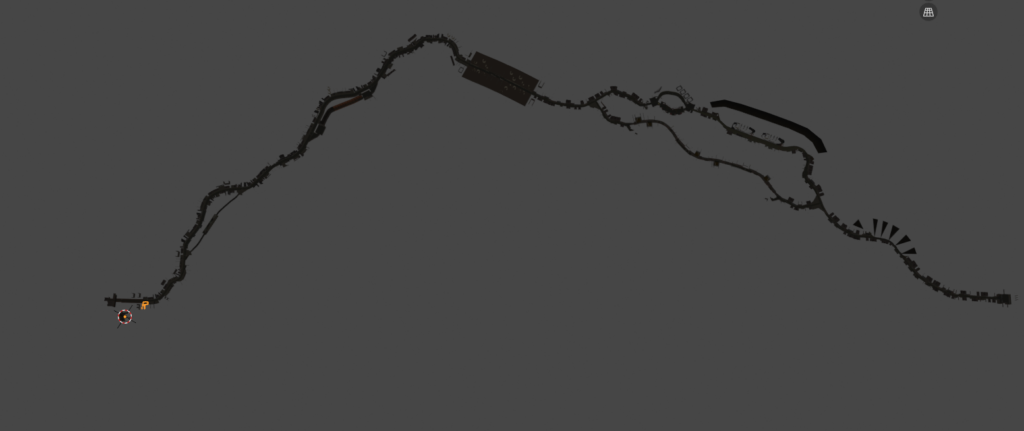
Once the import has successfully completed you will find the track inside blender – even if you switch to textured view there wont be any textures:
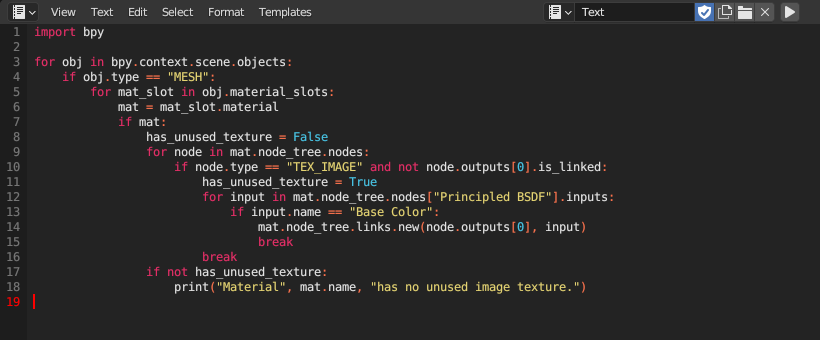
Step 7: Run the texture script
Inside the toolbox you will find a readme containing a script. Don’t bother, here is the script for you:
import bpy
import bpy

for obj in bpy.context.scene.objects:
    if obj.type == "MESH":
        for mat_slot in obj.material_slots:
            mat = mat_slot.material
            if mat:
                has_unused_texture = False
                for node in mat.node_tree.nodes:
                    if node.type == "TEX_IMAGE" and not node.outputs[0].is_linked:
                        has_unused_texture = True
                        for input in mat.node_tree.nodes["Principled BSDF"].inputs:
                            if input.name == "Base Color":
                                mat.node_tree.links.new(node.outputs[0], input)
                                break
                        break
                if not has_unused_texture:
                    print("Material", mat.name, "has no unused image texture.")
Copy this script and run it in the script window of blender. Please make sure that during the import AND before running the script the corresponding .tga-files have been in the same folder (not any subfolder) of your imported .lwo-files!
Insert the script and click “play” – wait a bit and your viewport will turn back to default shading, if you switch now back to textured view, you will see the track beautifully textured:
click this for textured view
Step 8 – optional – cleaning the object mess
As the track is now successfully imported you will find a pretty mess of easily over 1.000 single objects. For my further use that is totally useless, so I tend to sort the objects to
road
landscape
signs and other objects
foliage
movables
blockers
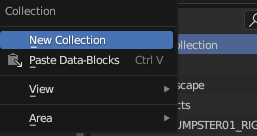
For this I simply create new collections and name them correspondingly
Once all sorting is done I can toggle all specific groups to check all objects are – more or less – properly sorted (I need this for the future rework of the track(s)).
After having them successfully sorted the objects are being united (except the movables). To do so just select all objects and press CTRL+J in object mode in the viewport.
Step 9 – further processing
As the track is now imported and saved you can do whatever your next steps are.
If you want to import some or all Need For Speed III – Hot Pursuit PSX tracks to blender this short guide might help you.
I digged into it to get to the data of the Playstation-only Tracks Autocross, Caverns, Scorpio-7, Space Race and The Room, but also to finally see the legend TR02B myself.
Personal trivia: I knew that there needed to be some sort of hidden tracks and cars beside the ones that I could ever find as I can clearly remember as if it was yesterday when I read an article about the upcoming NFS3 game showing a screenshot of both track and car that I could never find in the (PC-)release version. Due to the fact that I never had a PSX myself but playing it on PC, I honestly never looked after it. Today I found out that the screenshot was representing the Autocross-Track with the PSX El Nino which has (for some reason) differences in it’s rear end textures.
Adobe Photoshop (or any other tool with the ability to batch-convert BMP-files to PNG-files)
Setting up OpenNFS
This step might be optional as there could be other ways to get your hands on the texture of those tracks, but I found it the most easy way once you set up OpenNFS.
Once you have downloaded OpenNFS you may just want to extract the zipped folder to a location of your choice.
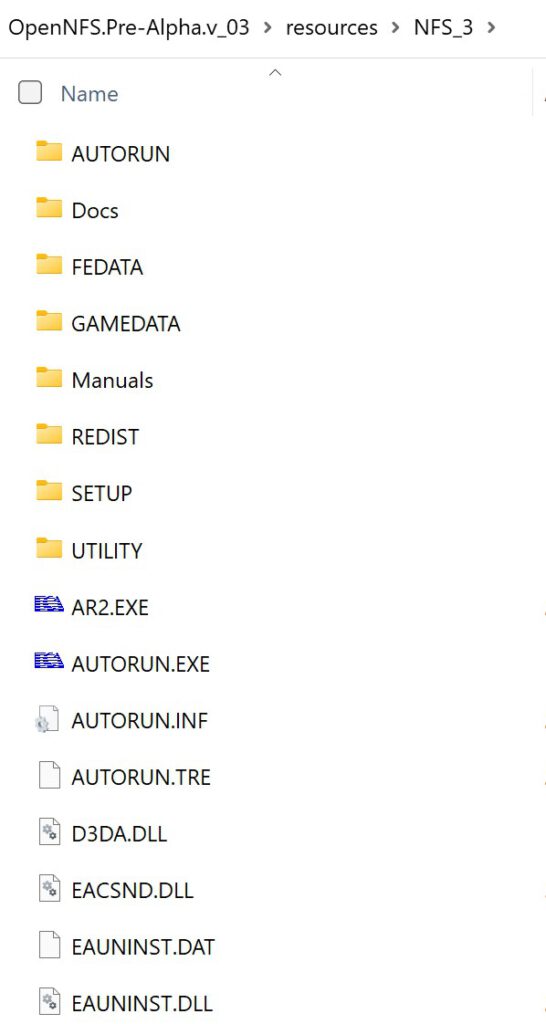
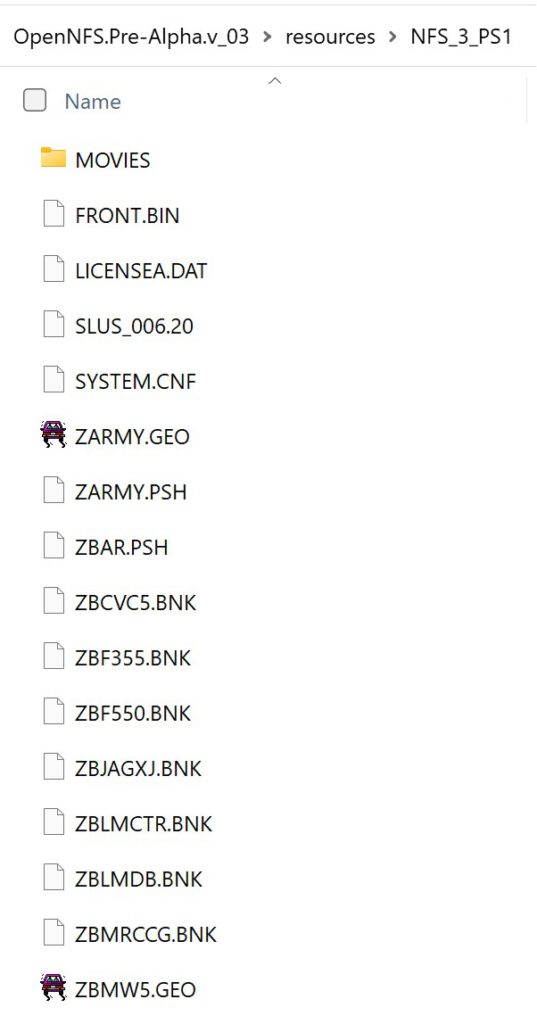
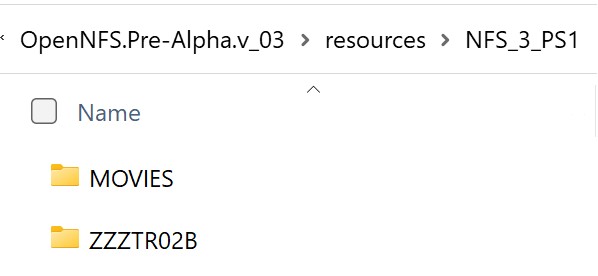
Following the original installation instruction (mirror) you then need to copy the whole NFSIII-PC files obtained from your original NFSIII-PC CD to resources/NFS_3 and the extracted files from your NFSIII-PSX CD to resouces/NFS_3_PS1, so that both folders look like the following screenhots show:
The following step with OpenNFS might be obsolete as there are other tools to convert the textures to BMP, PNG or whatever, but I personally found it the most easy way just to click through the dropdown in OpenNFS waiting for the tracks to load and have the textures all ready in each folder instead of working on a cli.
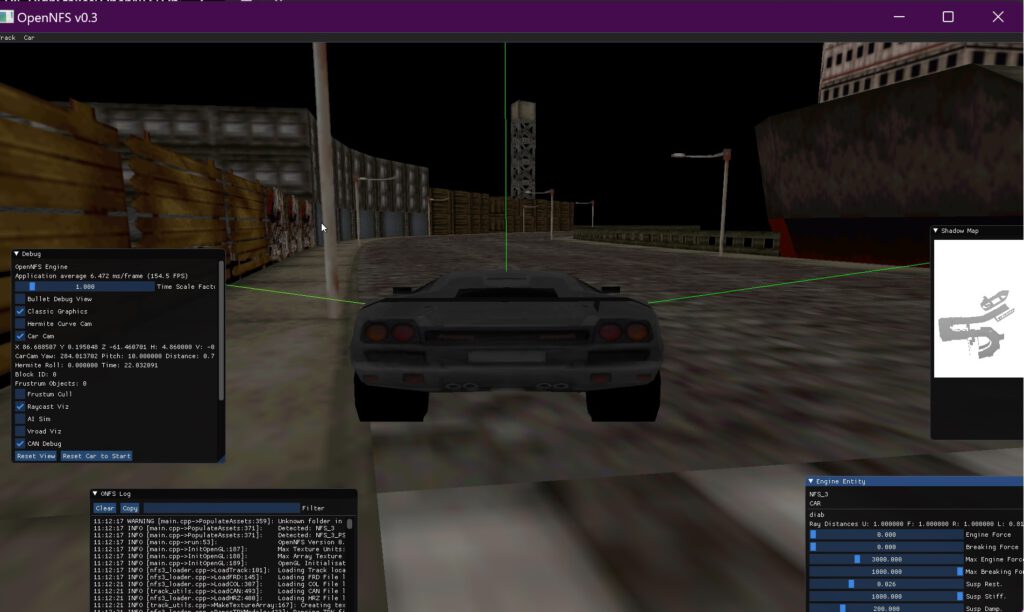
Starting OpenNFS
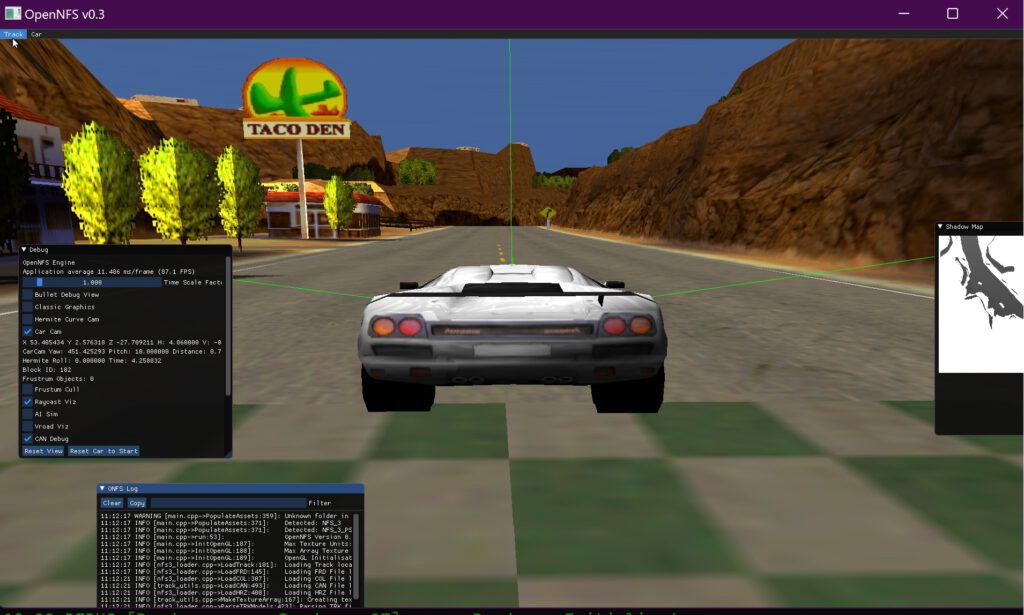
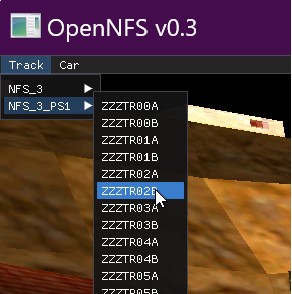
Once you started OpenNFS select TR02B (or any other track you like) from the track dropdown
In the cli window in the background you will notice some stuff going on, just be patient and wait for the track to load.
TR02B from NFS3 Hot Pursuit loaded in OpenNFS
Once the track is fully loaded you now may exit OpenNFS or take a lap around the track – your choice.
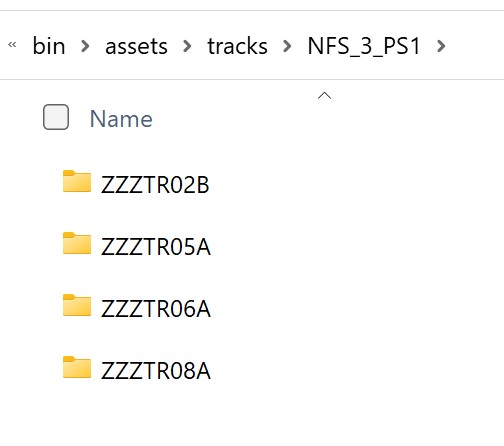
Afterwards you navigate to the installation directory of OpenNFS and jump to
/bin/assets/tracks/NFS_3_PS1/
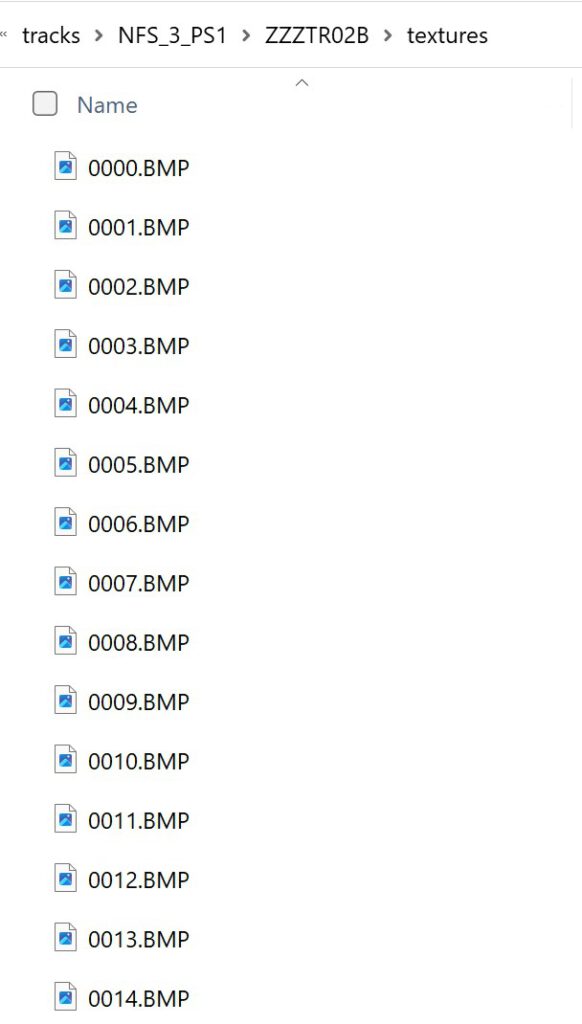
In there you will find all track-folders you already opened in OpenNFS containing each track’s textures as BMP files.
e.g. ZZZTR02B
Converting the BMP files to PNGs
As there are many ways to achieve that I will leave that up to you, I used a simple photoshop action and batch-runned it to get them into PNGs.
I suggest to store the png files in new folder. Personally, I always create new folders like
ROOT/exports/nfs3/tracks/tr02b/png
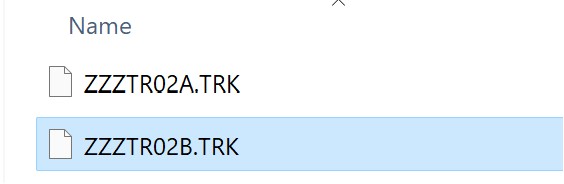
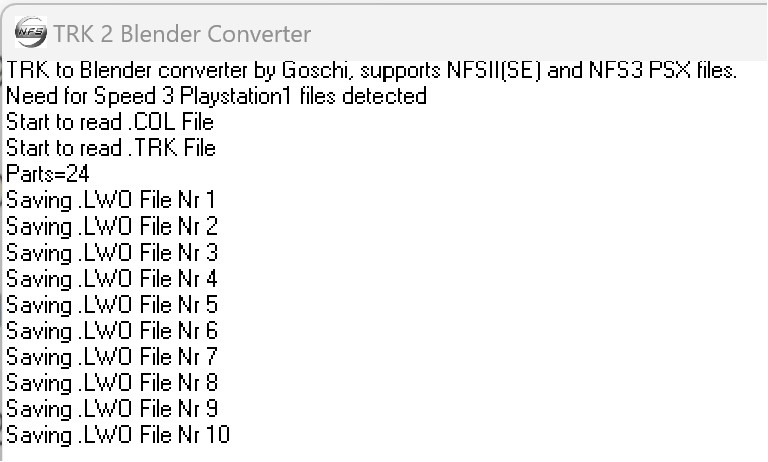
Converting the TRK files to Blender with TRK2Blender
Open the tool “TRK2Blender”, navigate to the PSX-files-folder within your OpenNFS installation directory and select the corresponding trk file, e.g. ZZZTRK02B.
Afterwars you will see the conversion process running
Prompting “Conversion complete, please exit.” when the process is completed. Within the NFS3-PSX file folder in OpenNFS’s resources you then will find a new folder named after the track file you opened containing all .lwo files.
Note: At this step I suggest to copy all .lwo-files to the export-folder above just to keep an eye on the exported files for later use maybe.
ROOT/exports/nfs3/tracks/tr02b/
Make sure you copied the bmps converted to png in the subfolder (here “PNG”; but the name is up to you, e.g. “textures” or whatever).
Start Blender
Once you started blender I prefer to empty the scene to remove unused content.
Open scripting tab, click “new” and paste the following script.
import os
import bpy

# put the location to the folder where the objs are located here in this fashion
# this line will only work on windows ie C:\objects
path_to_obj_dir = os.path.join('C:\\', 'Users', 'USERNAME', 'PATH', 'TO', 'YOUR', 'FILES')

# get list of all files in directory
file_list = sorted(os.listdir(path_to_obj_dir))

# get a list of files ending in 'obj'
obj_list = [item for item in file_list if item.endswith('.lwo')]

# loop through the strings in obj_list and add the files to the scene
for item in obj_list:
    path_to_file = os.path.join(path_to_obj_dir, item)
    bpy.ops.import_scene.lwo(filepath = path_to_file)
Make sure to edit the “path_to_obj_dir” var to match your folder structure, e.g.
In this *new* tutorial I explain how everyone of you can easily import tracks from NFS4 into blender. Forget the old tutorial. After digging the internet I found a small set of tools that will make your life much easier.
The old way as described in this tutorial was a huge workflow with alot of conversion time needed for many many manual processes such as converting textures and geometry, correcting texture offsets etc.
While I was – more or less accidently – searching for a method to convert NFS5 Porsche Unleashed tracks into blender I found the toolset “speedtools” by Rafał Kuźnia.
That guy is a time saver.
Once you worked through all the setup process for the tools you can just one-click import NFS4-tracks into blender, that’s it – just as easy as opening a .fbx-file.
It’s true, you can just go to file > import > track resources and open any* NFS4-track
Download all of them and have the NFS4-track files ready.
Install Blender
obviously, Blender needs to be installed, sherlock.
Install Kaitai Struct compiler
Right after you installed Blender go ahead and download and install the Katai Struct compiler. I suggest to use the install’s default settings and quickly click through the installer.
Start Blender
Now it’s time to start Blender. When blender has opened up you want to head to the scripting section from the very top main menu (at the very right side):
The viewport will change a lot. The window you are looking for is the bottom left console window where the input has the leading three “>” characters:
In this window just copy-paste the following command end hit enter. Once complete there will be a prompt with “0”. This command will install the python-tools needed.
Once this step is complete you need to save the blank project. Bear in mind that the project’s save location will be used from the importer to storage the imported images and assets in subfolder(s) created within the save location, so I suggest to choose carefully your save location, like the following:
../projects/hs/tracks/hometown/hometown.blend
Time to import
Yet, as all the steps above are done, all is set up for the first NFSHS-track import to blender.
To enable the easy import mode, you need to copy the content of the following script to your blender scripting tab, or save the file somewhere in your file system and open it up in blender:
#
# Copyright (c) 2023 Rafał Kuźnia <rafal.kuznia@protonmail.com>
#
# SPDX-License-Identifier: GPL-3.0-or-later
#
from __future__ import annotations
import logging
from abc import ABCMeta, abstractmethod
from collections.abc import Callable, Iterable
from dataclasses import dataclass
from functools import total_ordering
from itertools import chain, groupby
from math import pi
from pathlib import Path
from typing import Any
import bpy
import mathutils
from bpy.props import BoolProperty, EnumProperty, StringProperty
from more_itertools import collapse, duplicates_everseen, one, unique_everseen
from speedtools import TrackData, VivData
from speedtools.types import (
Action,
AnimationAction,
BaseMesh,
BlendMode,
Camera,
DirectionalLight,
DrawableMesh,
Light,
Matrix3x3,
Part,
Polygon,
Resource,
ShapeKey,
Vector3d,
Vertex,
)
from speedtools.utils import export_resource
logger = logging.getLogger()
logger.setLevel(logging.INFO)
logger.addHandler(logging.StreamHandler())
bl_info = {
"name": "Import NFS4 Track",
"author": "Rafał Kuźnia",
"version": (1, 0, 0),
"blender": (3, 4, 1),
"location": "File > Import > Track resource",
"description": "Imports a NFS4 track files (meshes, textures and objects)."
"Scripts/Import-Export/Track_Resource",
"category": "Import-Export",
}
@total_ordering
@dataclass(frozen=True)
class ExtendedResource:
resource: Resource
backface_culling: bool
def __lt__(self, other: ExtendedResource) -> bool:
return hash(self) < hash(other)
class BaseImporter(metaclass=ABCMeta):
def __init__(self, material_map: Callable[[Polygon], Resource]) -> None:
self.materials: dict[ExtendedResource, bpy.types.Material] = {}
self.material_map = material_map
@classmethod
def duplicate_common_vertices(cls, mesh: DrawableMesh) -> DrawableMesh:
unique_vert_polys = list(unique_everseen(mesh.polygons, key=lambda x: frozenset(x.face)))
duplicate_vert_polys = list(
duplicates_everseen(mesh.polygons, key=lambda x: frozenset(x.face))
)
faces = frozenset(chain.from_iterable(poly.face for poly in duplicate_vert_polys))
verts_to_duplicate = [mesh.vertices[x] for x in faces]
mapping = {f: i for i, f in enumerate(faces, start=len(mesh.vertices))}
def _make_polygon(polygon: Polygon) -> Polygon:
face = tuple(mapping[f] for f in polygon.face)
return Polygon(
face=face,
uv=polygon.uv,
material=polygon.material,
backface_culling=polygon.backface_culling,
)
polygons = unique_vert_polys + [_make_polygon(polygon) for polygon in duplicate_vert_polys]
vertices = list(mesh.vertices) + verts_to_duplicate
return DrawableMesh(vertices=vertices, polygons=polygons)
def _extender_resource_map(self, polygon: Polygon) -> ExtendedResource:
resource = self.material_map(polygon)
return ExtendedResource(resource=resource, backface_culling=polygon.backface_culling)
def _link_texture_to_shader(
self, node_tree: bpy.types.NodeTree, texture: bpy.types.Node, shader: bpy.types.Node
) -> None:
node_tree.links.new(texture.outputs["Color"], shader.inputs["Base Color"])
node_tree.links.new(texture.outputs["Alpha"], shader.inputs["Alpha"])
def _set_blend_mode(
self,
node_tree: bpy.types.NodeTree,
shader_output: bpy.types.NodeSocket,
bpy_material: bpy.types.Material,
resource: Resource,
) -> bpy.types.NodeSocket:
if resource.blend_mode is BlendMode.ALPHA:
bpy_material.blend_method = "BLEND"
elif resource.blend_mode is BlendMode.ADDITIVE:
bpy_material["SPT_additive"] = True
else:
bpy_material.alpha_threshold = 0.001
bpy_material.blend_method = "CLIP"
return shader_output
def _make_material(self, ext_resource: ExtendedResource) -> bpy.types.Material:
resource = ext_resource.resource
images_dir = Path(bpy.path.abspath("//images"))
export_resource(resource, directory=images_dir)
bpy_material = bpy.data.materials.new(resource.name)
bpy_material.use_nodes = True
image_path = Path(images_dir, f"{resource.name}.png")
image = bpy.data.images.load(str(image_path), check_existing=True)
node_tree = bpy_material.node_tree
material_output = node_tree.nodes.get("Material Output")
image_texture = node_tree.nodes.new("ShaderNodeTexImage")
image_texture.image = image # type: ignore[attr-defined]
image_texture.extension = "EXTEND" # type: ignore[attr-defined]
bsdf = node_tree.nodes["Principled BSDF"]
bsdf.inputs["Specular"].default_value = 0 # type: ignore[attr-defined]
bsdf.inputs["Roughness"].default_value = 1 # type: ignore[attr-defined]
bsdf.inputs["Sheen Tint"].default_value = 0 # type: ignore[attr-defined]
self._link_texture_to_shader(node_tree=node_tree, texture=image_texture, shader=bsdf)
output_socket = self._set_blend_mode(
node_tree=node_tree,
shader_output=bsdf.outputs["BSDF"],
bpy_material=bpy_material,
resource=resource,
)
node_tree.links.new(output_socket, material_output.inputs["Surface"])
bpy_material.use_backface_culling = ext_resource.backface_culling
return bpy_material
def _map_material(self, ext_resource: ExtendedResource) -> bpy.types.Material:
try:
return self.materials[ext_resource]
except KeyError:
bpy_material = self._make_material(ext_resource=ext_resource)
self.materials[ext_resource] = bpy_material
return self.materials[ext_resource]
def make_base_mesh(self, name: str, mesh: BaseMesh) -> bpy.types.Mesh:
bpy_mesh = bpy.data.meshes.new(name)
bpy_mesh.from_pydata(
vertices=list(mesh.vertex_locations),
edges=[],
faces=[polygon.face for polygon in mesh.polygons],
)
return bpy_mesh
def set_object_location(self, obj: bpy.types.Object, location: Vector3d) -> None:
mu_location = mathutils.Vector(location)
obj.location = mu_location
def set_object_action(self, obj: bpy.types.Object, action: AnimationAction) -> None:
animation = action.animation
obj.rotation_mode = "QUATERNION"
if obj.animation_data is None:
anim_data = obj.animation_data_create()
else:
anim_data = obj.animation_data
bpy_action = bpy.data.actions.new(name=str(action.action))
anim_data.action = bpy_action
for index, (location, quaternion) in enumerate(
zip(animation.locations, animation.quaternions)
):
mu_location = mathutils.Vector(location)
mu_quaternion = mathutils.Quaternion(quaternion)
mu_quaternion = mu_quaternion.normalized()
mu_quaternion = mu_quaternion.inverted()
obj.delta_location = mu_location
obj.delta_rotation_quaternion = mu_quaternion # type: ignore[assignment]
interval = index * animation.delay
obj.keyframe_insert(
data_path="delta_location", frame=interval, options={"INSERTKEY_CYCLE_AWARE"}
)
obj.keyframe_insert(
data_path="delta_rotation_quaternion",
frame=interval,
options={"INSERTKEY_CYCLE_AWARE"},
)
points = chain.from_iterable(fcurve.keyframe_points for fcurve in bpy_action.fcurves)
for point in points:
point.interpolation = "LINEAR"
bpy_action.name = f"{obj.name}-action-{action.action}"
track = anim_data.nla_tracks.new()
track.strips.new(name=bpy_action.name, start=0, action=bpy_action)
def set_object_rotation(
self,
obj: bpy.types.Object,
transform: Matrix3x3,
offset: mathutils.Euler | None = None,
) -> None:
mu_matrix = mathutils.Matrix(transform)
if offset:
mu_euler = offset
mu_euler.rotate(mu_matrix.to_euler("XYZ")) # type: ignore # pylint: disable=all
else:
mu_euler = mu_matrix.to_euler("XYZ") # type: ignore # pylint: disable=all
obj.rotation_mode = "XYZ"
obj.rotation_euler = mu_euler # type: ignore[assignment]
def make_drawable_object(
self, name: str, mesh: DrawableMesh, import_shading: bool = False
) -> bpy.types.Object:
bpy_mesh = self.make_base_mesh(name=name, mesh=mesh)
uv_layer = bpy_mesh.uv_layers.new()
uvs = collapse(polygon.uv for polygon in mesh.polygons)
uv_layer.data.foreach_set("uv", list(uvs))
if mesh.vertex_normals:
normals = tuple(mesh.vertex_normals)
# I have no idea if setting the normals even works
bpy_mesh.normals_split_custom_set_from_vertices(normals) # type: ignore[arg-type]
if mesh.vertex_colors and import_shading:
colors = collapse(color.rgba_float for color in mesh.vertex_colors)
bpy_colors = bpy_mesh.color_attributes.new(
name="Shading", type="FLOAT_COLOR", domain="POINT"
)
bpy_colors.data.foreach_set("color", tuple(colors)) # type: ignore[attr-defined]
polygon_pairs = zip(mesh.polygons, bpy_mesh.polygons)
sorted_by_material = sorted(polygon_pairs, key=lambda x: self._extender_resource_map(x[0]))
grouped_by_material = groupby(
sorted_by_material, key=lambda x: self._extender_resource_map(x[0])
)
for index, (key, group) in enumerate(grouped_by_material):
material = self._map_material(key)
bpy_mesh.materials.append(material)
for _, bpy_polygon in group:
bpy_polygon.use_smooth = True
bpy_polygon.material_index = index
bpy_mesh.validate()
bpy_obj = bpy.data.objects.new(name, bpy_mesh)
if mesh.shape_keys:
bpy_obj.shape_key_add(name="Basis")
return bpy_obj
def make_light_object(self, name: str, light: Light) -> bpy.types.Object:
bpy_light = bpy.data.lights.new(name=name, type="POINT")
bpy_light.color = light.attributes.color.rgb_float
bpy_light.use_custom_distance = True
bpy_light.cutoff_distance = 15.0
bpy_light.specular_factor = 0.2
bpy_light.energy = 500 # type: ignore[attr-defined]
bpy_light.use_shadow = False # type: ignore[attr-defined]
bpy_obj = bpy.data.objects.new(name=name, object_data=bpy_light)
self.set_object_location(obj=bpy_obj, location=light.location)
return bpy_obj
def make_directional_light_object(
self, name: str, light: DirectionalLight
) -> bpy.types.Object:
bpy_sun = bpy.data.lights.new(name=name, type="SUN")
bpy_obj = bpy.data.objects.new(name=name, object_data=bpy_sun)
mu_euler = mathutils.Euler(light.euler_xyz)
bpy_obj.rotation_mode = "XYZ"
bpy_obj.rotation_euler = mu_euler # type: ignore[assignment]
return bpy_obj
def make_camera_object(self, name: str, camera: Camera) -> bpy.types.Object:
bpy_camera = bpy.data.cameras.new(name=name)
bpy_obj = bpy.data.objects.new(name=name, object_data=bpy_camera)
offset = mathutils.Euler((pi / 2, 0, 0))
self.set_object_location(obj=bpy_obj, location=camera.location)
self.set_object_rotation(obj=bpy_obj, transform=camera.transform, offset=offset)
return bpy_obj
def make_shape_key(self, obj: bpy.types.Object, shape_key: ShapeKey) -> None:
bpy_shape_key = obj.shape_key_add(name=shape_key.type.name)
bpy_shape_key.interpolation = "KEY_LINEAR"
for data, vertex in zip(bpy_shape_key.data, shape_key.vertices, strict=True):
data.co = vertex.location # type: ignore[attr-defined]
class TrackImportStrategy(metaclass=ABCMeta):
@abstractmethod
def import_track(
self,
track: TrackData,
import_collision: bool = False,
import_shading: bool = False,
import_actions: bool = False,
import_cameras: bool = False,
) -> None:
pass
class TrackImportGLTF(TrackImportStrategy, BaseImporter):
def import_track(
self,
track: TrackData,
import_collision: bool = False,
import_shading: bool = False,
import_actions: bool = False,
import_cameras: bool = False,
) -> None:
bpy.context.scene.render.fps = track.ANIMATION_FPS
track_collection = bpy.data.collections.new("Track segments")
bpy.context.scene.collection.children.link(track_collection)
for index, segment in enumerate(track.track_segments):
name = f"Segment {index}"
segment_collection = bpy.data.collections.new(name=name)
track_collection.children.link(segment_collection)
bpy_obj = self.make_drawable_object(
name=name, mesh=segment.mesh, import_shading=import_shading
)
segment_collection.objects.link(bpy_obj)
if import_collision:
for collision_index, collision_mesh in enumerate(segment.collision_meshes):
effect = collision_mesh.collision_effect
name = f"Collision {collision_index}.{effect}-colonly"
bpy_mesh = self.make_base_mesh(name=name, mesh=collision_mesh)
bpy_obj = bpy.data.objects.new(name, bpy_mesh)
segment_collection.objects.link(bpy_obj)
bpy_obj.hide_set(True)
object_collection = bpy.data.collections.new("Objects")
bpy.context.scene.collection.children.link(object_collection)
for index, obj in enumerate(track.objects):
name = f"Object {index}"
mesh = self.duplicate_common_vertices(mesh=obj.mesh)
bpy_obj = self.make_drawable_object(
name=name, mesh=mesh, import_shading=import_shading
)
actions = (
obj.actions
if import_actions
else filter(lambda x: x.action is Action.DEFAULT_LOOP, obj.actions)
)
for action in actions:
self.set_object_action(obj=bpy_obj, action=action)
if obj.location:
self.set_object_location(obj=bpy_obj, location=obj.location)
if obj.transform:
self.set_object_rotation(obj=bpy_obj, transform=obj.transform)
object_collection.objects.link(bpy_obj)
light_collection = bpy.data.collections.new("Lights")
bpy.context.scene.collection.children.link(light_collection)
for index, light in enumerate(track.lights):
name = f"Light {index}"
bpy_obj = self.make_light_object(name=name, light=light)
light_collection.objects.link(bpy_obj)
directional_light = track.directional_light
if directional_light:
bpy_obj = self.make_directional_light_object(name="sun", light=directional_light)
light_collection.objects.link(bpy_obj)
if import_cameras:
camera_collection = bpy.data.collections.new("Cameras")
bpy.context.scene.collection.children.link(camera_collection)
for index, camera in enumerate(track.cameras):
bpy_obj = self.make_camera_object(name=f"Camera {index}", camera=camera)
camera_collection.objects.link(bpy_obj)
class TrackImportBlender(TrackImportGLTF):
def _link_texture_to_shader(
self, node_tree: bpy.types.NodeTree, texture: bpy.types.Node, shader: bpy.types.Node
) -> None:
color_attributes = node_tree.nodes.new("ShaderNodeAttribute")
color_attributes.attribute_name = "Shading" # type: ignore[attr-defined]
mixer = node_tree.nodes.new("ShaderNodeMixRGB")
mixer.blend_type = "MULTIPLY" # type: ignore[attr-defined]
mixer.inputs["Fac"].default_value = 1.0 # type: ignore[attr-defined]
node_tree.links.new(texture.outputs["Color"], mixer.inputs["Color1"])
node_tree.links.new(color_attributes.outputs["Color"], mixer.inputs["Color2"])
node_tree.links.new(mixer.outputs["Color"], shader.inputs["Base Color"])
node_tree.links.new(texture.outputs["Alpha"], shader.inputs["Alpha"])
def _set_blend_mode(
self,
node_tree: bpy.types.NodeTree,
shader_output: bpy.types.NodeSocket,
bpy_material: bpy.types.Material,
resource: Resource,
) -> bpy.types.NodeSocket:
shader_output = super()._set_blend_mode(
node_tree=node_tree,
shader_output=shader_output,
bpy_material=bpy_material,
resource=resource,
)
output_socket = shader_output
if resource.blend_mode is BlendMode.ADDITIVE:
bpy_material.blend_method = "BLEND"
transparent_bsdf = node_tree.nodes.new("ShaderNodeBsdfTransparent")
add_shader = node_tree.nodes.new("ShaderNodeAddShader")
node_tree.links.new(shader_output, add_shader.inputs[0])
node_tree.links.new(transparent_bsdf.outputs["BSDF"], add_shader.inputs[1])
output_socket = add_shader.outputs["Shader"]
return output_socket
class CarImporterSimple(BaseImporter):
def import_car(self, parts: Iterable[Part]) -> None:
car_collection = bpy.data.collections.new("Car parts")
bpy.context.scene.collection.children.link(car_collection)
for part in parts:
bpy_obj = self.make_drawable_object(name=part.name, mesh=part.mesh)
self.set_object_location(obj=bpy_obj, location=part.location)
car_collection.objects.link(bpy_obj)
for shape_key in part.mesh.shape_keys:
self.make_shape_key(obj=bpy_obj, shape_key=shape_key)
class TrackImporter(bpy.types.Operator):
"""Import NFS4 Track Operator"""
bl_idname = "import_scene.nfs4trk"
bl_label = "Import NFS4 Track"
bl_description = "Import NFS4 track files"
bl_options = {"REGISTER", "UNDO"}
bpy.types.Scene.nfs4trk = None # type: ignore[attr-defined]
directory: StringProperty( # type: ignore[valid-type]
name="Directory Path",
description="Directory containing the track files",
maxlen=1024,
default="",
)
mode: EnumProperty( # type: ignore[valid-type]
name="Mode",
items=(
(
"GLTF",
"GLTF target",
"Parametrized import of visible track geometry, lights, animations, "
"collision geometry and more. Stores data that can't be represented in "
"GLTF 'extras' fields.",
),
(
"BLENDER",
"Blender target",
"This option should be used when accurate look in Blender is desired. "
"Some data, such as vertex shading, can't be viewed in Blender without specific "
"shader node connections. Such connections are on the other hand poorly understood "
"by exporters, such as the GLTF exporter. Therefore this mode must never be "
"used if you intent to export the track to GLTF. Vertex shading is always enabled "
"in this mode.",
),
),
description="Select importer mode",
)
night: BoolProperty( # type: ignore[valid-type]
name="Night on", description="Import night track variant", default=False
)
weather: BoolProperty( # type: ignore[valid-type]
name="Weather on", description="Import rainy track variant", default=False
)
mirrored: BoolProperty( # type: ignore[valid-type]
name="Mirrored on", description="Import mirrored track variant", default=False
)
import_shading: BoolProperty( # type: ignore[valid-type]
name="Import vertex shading",
description="Import original vertex shading to obtain the 'original' track look",
default=False,
)
import_collision: BoolProperty( # type: ignore[valid-type]
name="Import collision (experimental)",
description="Import collision meshes (ending with -colonly)",
default=False,
)
import_actions: BoolProperty( # type: ignore[valid-type]
name="Import animation actions (experimental)",
description="Import track animation actions from CAN files, such as object destruction animation",
default=False,
)
import_cameras: BoolProperty( # type: ignore[valid-type]
name="Import cameras (experimental)",
description="Import track-specific replay cameras",
default=False,
)
def invoke(self, context: bpy.types.Context, event: bpy.types.Event) -> set[int] | set[str]:
wm = context.window_manager
wm.fileselect_add(self)
return {"RUNNING_MODAL"}
def execute(self, context: bpy.types.Context) -> set[int] | set[str]:
directory = Path(self.directory)
# This should get us from track directory to game root directory
game_root = directory.parent.parent.parent
track = TrackData(
directory=Path(self.directory),
game_root=game_root,
mirrored=self.mirrored,
night=self.night,
weather=self.weather,
)
import_shading = self.import_shading
import_strategy: TrackImportStrategy
if self.mode == "GLTF":
import_strategy = TrackImportGLTF(material_map=track.get_polygon_material)
elif self.mode == "BLENDER":
import_strategy = TrackImportBlender(material_map=track.get_polygon_material)
import_shading = True
else:
return {"CANCELLED"}
import_strategy.import_track(
track=track,
import_collision=self.import_collision,
import_shading=import_shading,
import_actions=self.import_actions,
import_cameras=self.import_cameras,
)
return {"FINISHED"}
class CarImporter(bpy.types.Operator):
"""Import NFS4 Car Operator"""
bl_idname = "import_scene.nfs4car"
bl_label = "Import NFS4 Car"
bl_description = "Import NFS4 Car files"
bl_options = {"REGISTER", "UNDO"}
bpy.types.Scene.nfs4car = None # type: ignore
directory: StringProperty( # type: ignore
name="Directory Path",
description="Directory containing the car files",
maxlen=1024,
default="",
)
import_interior: BoolProperty( # type: ignore[valid-type]
name="Import interior", description="Import car interior geometry", default=False
)
def invoke(self, context: bpy.types.Context, event: bpy.types.Event) -> set[int] | set[str]:
wm = context.window_manager
wm.fileselect_add(self)
return {"RUNNING_MODAL"}
def execute(self, context: bpy.types.Context) -> set[int] | set[str]:
car = VivData.from_file(Path(self.directory, "CAR.VIV"))
logger.debug(car)
if self.import_interior:
resource = one(car.interior_materials)
parts = car.interior
else:
resource = one(car.body_materials)
parts = car.parts
importer = CarImporterSimple(material_map=lambda _: resource)
importer.import_car(parts)
return {"FINISHED"}
def menu_func(self: Any, context: bpy.types.Context) -> None:
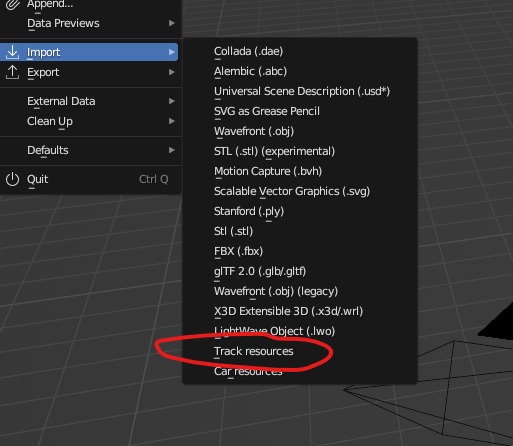
self.layout.operator(TrackImporter.bl_idname, text="Track resources")
self.layout.operator(CarImporter.bl_idname, text="Car resources")
def register() -> None:
bpy.utils.register_class(TrackImporter)
bpy.utils.register_class(CarImporter)
bpy.types.TOPBAR_MT_file_import.append(menu_func)
def unregister() -> None:
bpy.utils.unregister_class(TrackImporter)
bpy.utils.unregister_class(CarImporter)
bpy.types.TOPBAR_MT_file_import.remove(menu_func)
if __name__ == "__main__":
register()
Once this file / script is loaded you can hit the play button in the scripting window. Bear in mind that the project’s save location will be used from the importer to storage the imported images and assets in subfolder(s) created within the save location.
Now, when you executed the script, you will find the option “Track Resources” under the file > import option.
In the import window you now can browse to your NFS4/NFSHS track-folder within your NFS installation directory.
Warning! Opening Tracks outside the NFS-installation directory will not work as the importer requires global NFS-assets such as sounds, textures and other information.
▶️▶️In case you want to import an Addon-Track, read here.
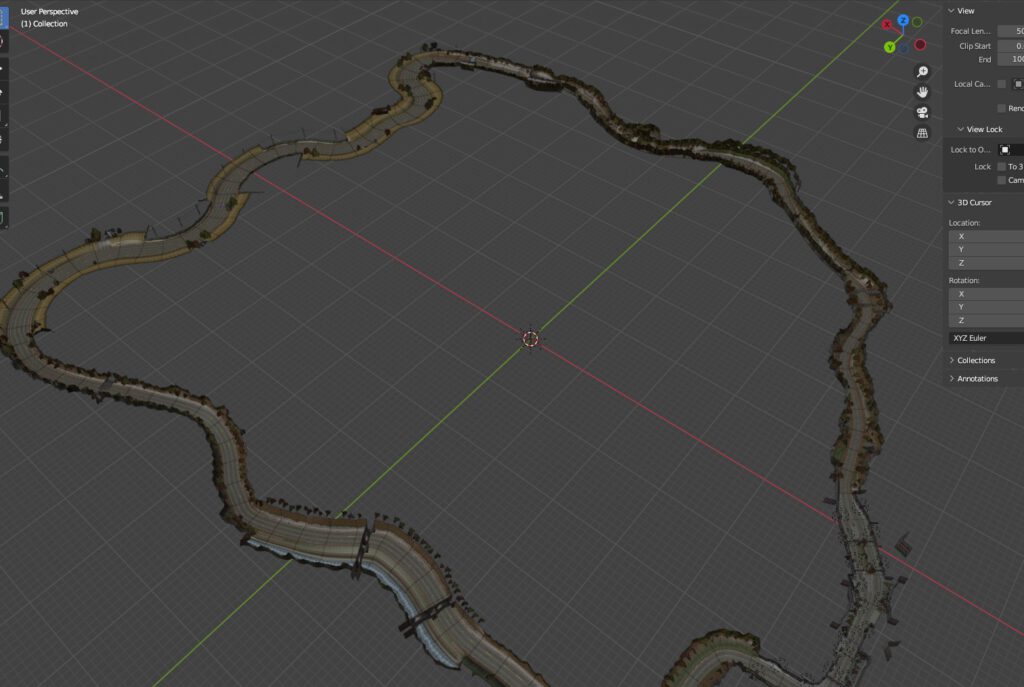
When you arrived at the track folder, open up the folder containing the track you want to import, e.g. EMPIRE (= Empire City) and click on import.
Now just wait a couple of seconds and keep an eye in the scene overview on the top right corner. Soon you will notice that there will be a couple of folders and objects appearing – that is your imported track!
How to import an NFS-Addon track to blender?
So, it seems that you are interested in opening/importing an community made track in blender. The import itself is working the exact way it does as for official tracks but requires some work right before you can import them.
Setting up the track folder
You – basically – need to to the same kind of work that you would need to do to get the track working in the NFS-game, the major difference here is that you do not need to overwrite the track the addon is based on.
Let’s say you downloaded this track here:
Mololithic Studios for NFS4 High Stakes
Author of Track Conversion: Ryan Trevisol
Author of Track Enhancement: KillRide and UnBtable
and changes by JimDiabolo & Benyy
It is a replacement for the official NFS-Track “Empire City”. So head over to your track-folder in the NFS4-installation directory, locate the original track folder (in this case “EMPIRE”) and duplicate and rename it as you wish, e.g “MONOLITHIC“.
Now copy all addon-content over the original content within the new folder “MONOLITHIC” – and select overwrite-yes of course.
*any: you can also convert NFS:HS addon-tracks, such as "Lake Diablo" (get it here), but you need to copy the addon-track files over the original NFS:HS track it is replacing, just as you would do if you want to play the addon track ingame as the tools are requiring all animation, sounds etc. - read the tutorial for addon-tracks here.
Yes, you are absolutely right if you begin reading this and instantly think “why should I rework it – there are tons of blueprints or ready-to-buy (or even free) versions of the cars all around the internet”.
That is in fact true, but now for all the so called fantasy cars that exist within the nfs-franchise, mainly in the first four releases.
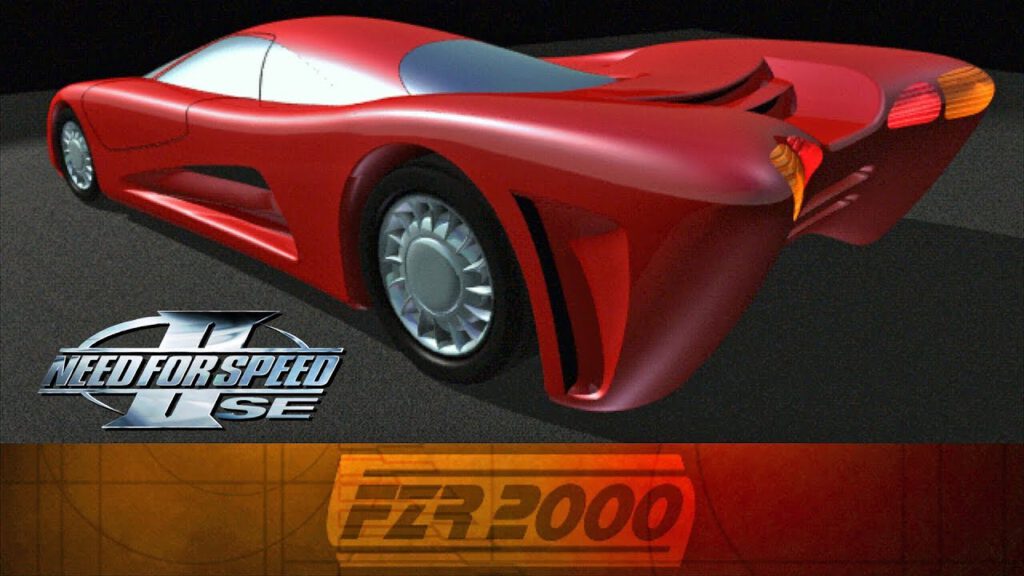
Chronologically I should start here with recreating the “Warrior PTO/E2” from the very first “Road & Track presents – The Need for Speed”. But as I did not (yet) find a way of converting the NFS1 car models to somewhat nowadays processable format, I am starting with the FZR2000 from NFS2(SE).
FZR2000 from “Need For Speed 2 Special Edition” – Source and Copyright Electronic Arts
Converting from old file format to new file format as preparation
Converting the car from NFS2SE to NFS2.
For some reason the car file format in NFS2SE differs from the ones in NFS2. So, as the car editor only supports NFS2 file format, the first step is to convert it back from NFS2SE to NFS2 as I only own the SE-version of the game.
The conversion process itself is very easy and basic and can be done with a simple tool named “CarEditor” by Mike “Thommson”.
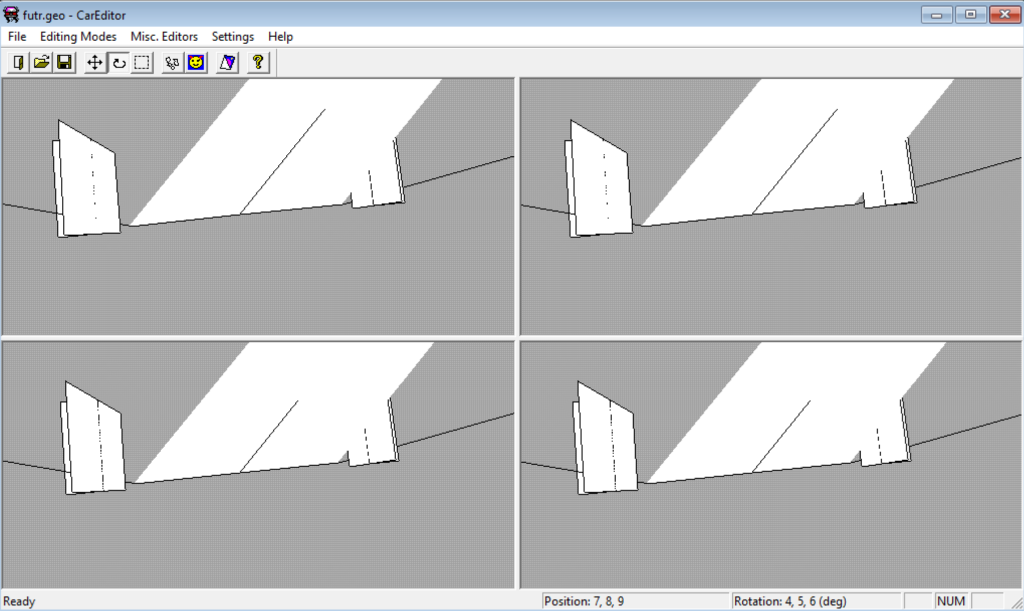
Once the program is started, just oben “NFS2SE” car, select the “futr.geo” and save it as NFS2 car somewhere in your file system
Dont bother the messed up geometry, I do think this (and most) NFS tools are not designed to work on the Windows NT (or in my case Windows 11) system in any way.
Convert the NFS2 car to NFS3
The next step is even more easy, but yet also buggy. You need to convert the NFS2 car file to NFS3. This is done by using the DOS command line tool “car2nfs3”, also written by Mike ‘Thommson’
The use here is simly easy, just copy the futr.geo (from the step above or from the non-SE version of NFS2) and futr.qfs (from the gamedata folder) to the folder where the binary of car2nfs3 is located.
car2nfs3 futr.geo futr.qfs car.fce car00.tga
this promt will convert the car and texture file to the nfs3 formats.
Convert the FCE file to 3ds
Now, the next step is already getting the .fce geometry file into nowadays file format “3ds” using the old(!) version 1.07b of the Zanoza3d Modeler, as version 2 and higher do not support nfs3 and nfs4 file formats.
Damn, what did I miss this software, and on the same time not. Comparing it to nowadays workflows all those tools are really a pain regarding the usability and stability. Don’t get me wrong, I really love that they do exist and did exist back in those days where I started modding and modelling, and I am so thankful towards the autors and pay them as much respect as I can, but the tools have improved in the last years and so have my workflows, and it really feels odd to use those old tools in 2023.
Now, having the .fce file in z3d the geometry can finally be exported to 3ds – meaning it can now be imported to Blender, 3D Studio or whatever tool you prefer to use.
Kind of impressive how lowpoly the cars have been back then right? I mean, look at those “wheels”.
Texturing
As within the conversion process the texture(s) of the car have also been converted you “just” need to flip them once vertically as for some reason the UV coordinates are upside down.
Mind: The screenshot already shows an optimized mesh with reworked wheel arches and wheels and a repainted a-pillar.
Welding
As for some reason the converted meshes are not featuring welded (connected) vertices anymore this needs to be done (by pressing A-key in the edit mode in blender and then selecting the weld modifier).
The result after all conversions
Once the textures are applied and all vertices are welded back together we now have a solid base as blueprint for reworking the model.
Reworking
Having the old original model as base, together with the only two artwork-images exisiting the process can finally start.
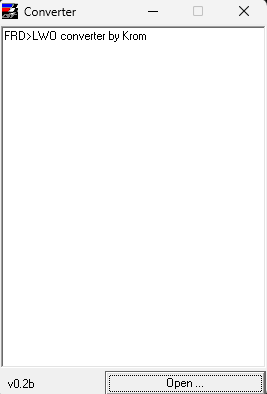
The first tool you need to use is “frd2lwo” – this is a light weight gui-based tool to convert frd-files (nfs3/nfs4 native track file format) to lwo (lightwave object).
The tool right after first start
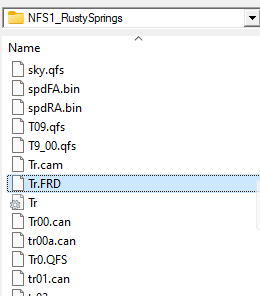
As easy as it can be, click “open” and locate your .frd-file.
Select the Tr.FRD of the track you want to convert
Select the file and once again click “open”
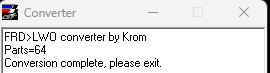
Once the conversion process is completed, you will kindly be asked to exit the tool.
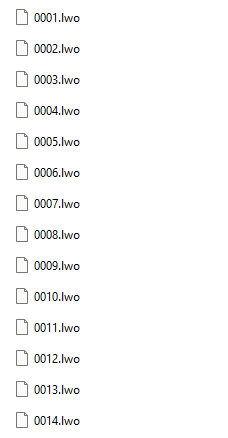
Now, if you browse to the source folder of your .frd-file you will now find a new folder “LWO” containing all the .lwo-converted files of the original track.
Just like in the original frd file each block has been converted to a single .lwo file.
Meaning: the longer the track (the more blocks it has) the more files you will get, yay.
Step 2 – preparing track textures
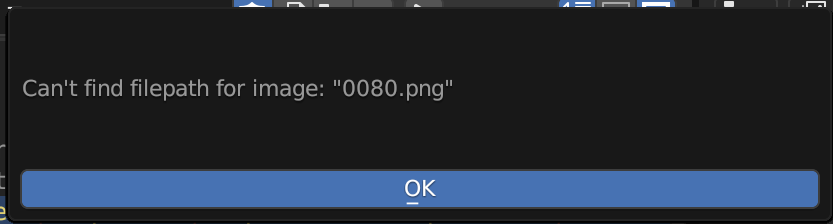
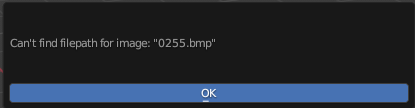
If you would like to skip this step – be warned, the LWO is always prompting an error for each missing texture piece.
Although we won’t be able to create all textures in the following process, we will reduce the amount of missing textures alot.
Reading this tutorial you might be into NFS-modding and maybe aware of where to get the textures from. If not, I will gladly tell you.
The textures of NFS3/NFS4 tracks are stored within the .qfs-file. QFS is a sort of container format containing all textures, really weird.
Step 2.1 – QFS2FSH
The first step is to convert the .qfs-file into a fsh-file. Therefor we need the tool qfs2fsh – this is a command line tool.
The basic syntax is
qfs2fsh source.qfs target.fsh
e.g. qfs2fsh tr0.qfs provinggrounds.fsh
You may want to copy the .qfs into the place of the binary, I think
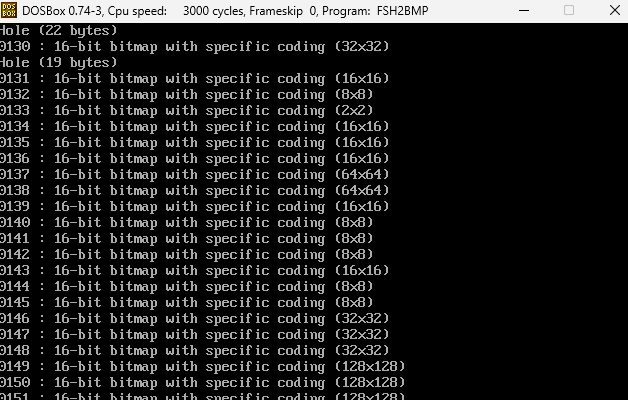
Step 2.2 – FSH2BMP
The second step is to convert the .fsh-file into tga-files. Therefor we need the tool fsh2bmp – a part of the QFSSuite – this is a command line tool.
The basic syntax is
fsh2bmp source.fshTARGETFOLDER
e.g. fsh2bmp provinggrounds.fsh BMP
You may want to copy the .fsh into the place of the binary, I think.
If you are using Windows in 64 bit version you might need to run qfssuite, at least for fsh2bmp in a dosbox or similar.
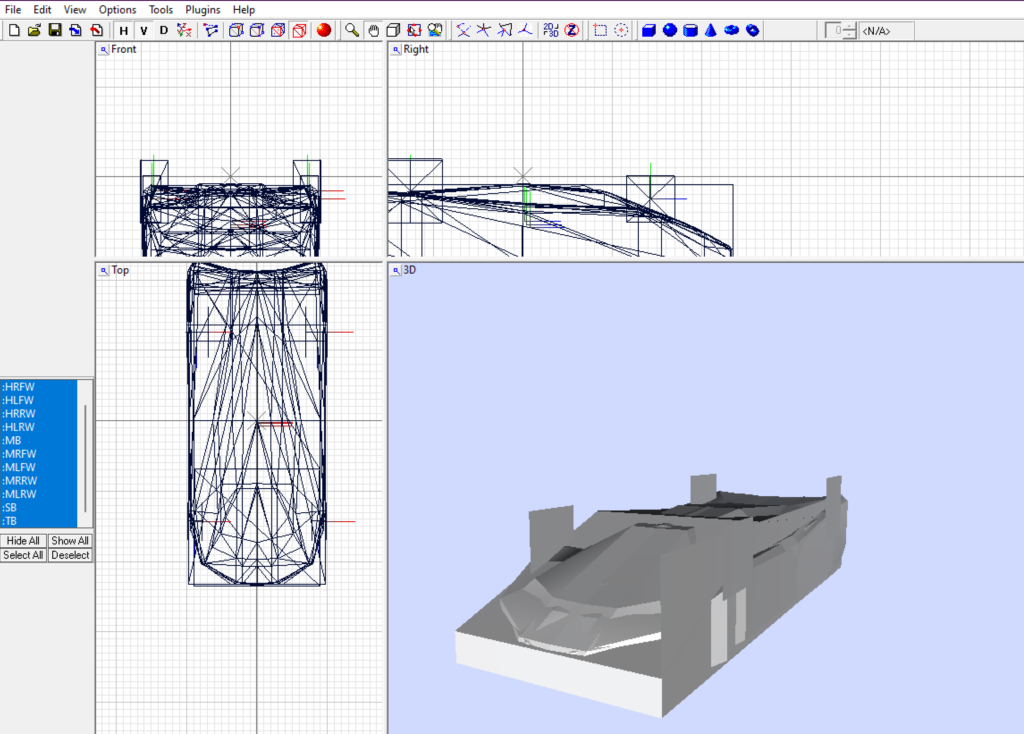
And you finally have all single textures as BMP
Step 3 – Getting the LWO-Files in blender
Once you have converted the track to LWO you want to start blender and activate the lwo-import plugin.
Now you could import one block after the other for the whole track..
Or you may use the lwo mass import script for blender
import os
import bpy

# put the location to the folder where the objs are located here in this fashion
# this line will only work on windows ie C:\objects
path_to_obj_dir = os.path.join('F:\\', 'test')

# get list of all files in directory
file_list = sorted(os.listdir(path_to_obj_dir))

# get a list of files ending in 'obj'
obj_list = [item for item in file_list if item.endswith('.lwo')]

# loop through the strings in obj_list and add the files to the scene
for item in obj_list:
    path_to_file = os.path.join(path_to_obj_dir, item)
    bpy.ops.import_scene.lwo(filepath = path_to_file)
Of course you need to adjust the path_to_obj_dir with your drive letter and folder structure, and bare in mind that you need to escape the “\”-character like \\this\\is\\a\\folder
And then, click “play” – this may take long and sometimes blender will crash, which can be related to a specific block. I could not find any reason, but I just try and error with removing files from the batch import folder until it is working.
You also may want to check if all blocks are imported correctly as there might be any gaps.
TIP: If you keep on encountering errors while importing or opening even one single .lwo file, try to get another version of the track you want to import as there may be faulty blocks.
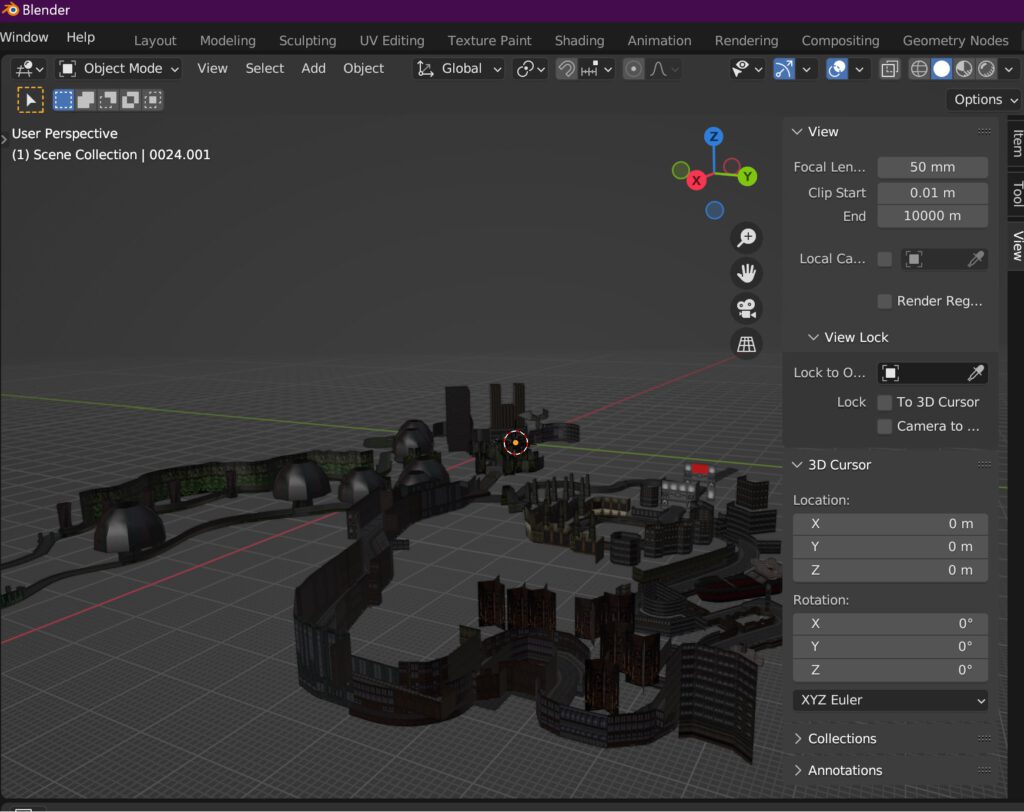
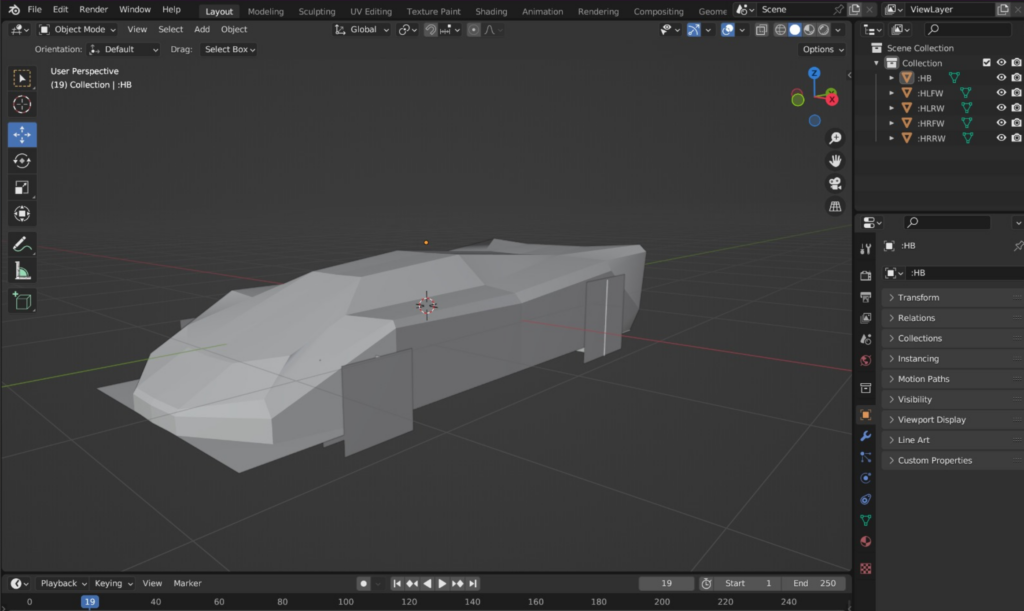
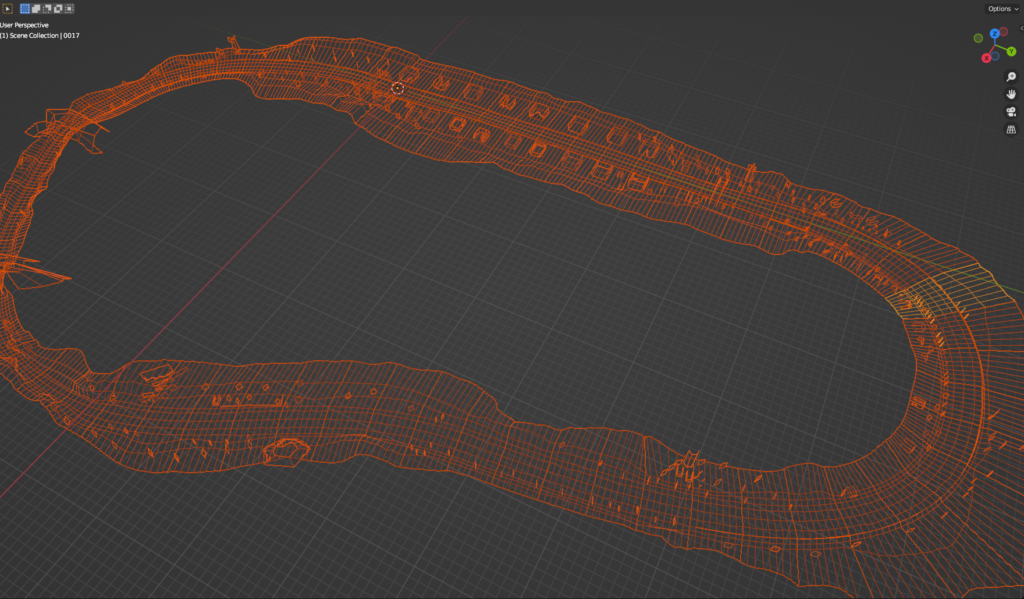
Finally, you have all the track data into blender – one step further of having the good old track information in somewhat up-to-date file format. I suggest to save the .blend project right now, just in case.
Looks familiar, huh?
Anyway – within the import process – I would suggest to save the blender project each time possible, as using all this tools is very fragile.
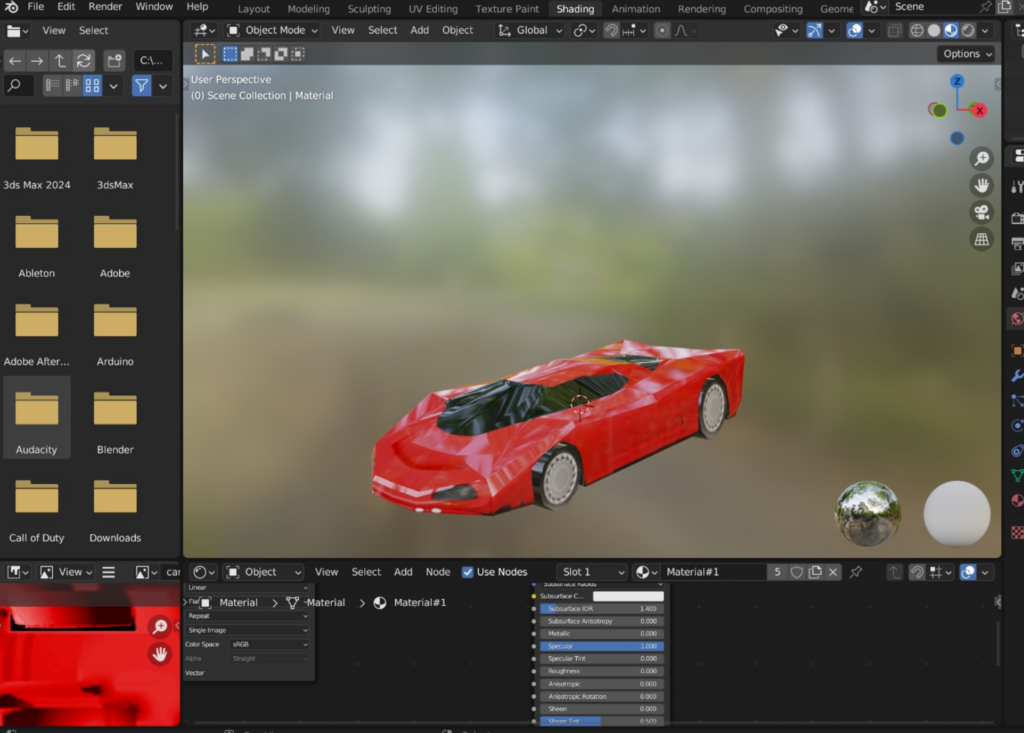
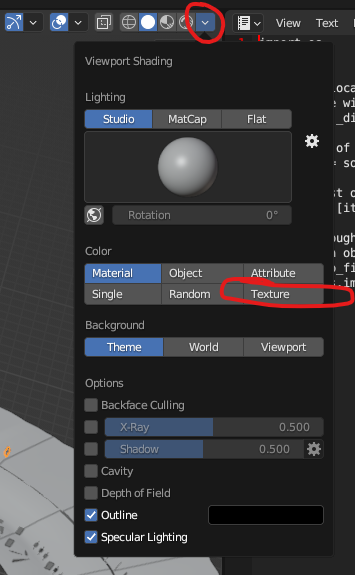
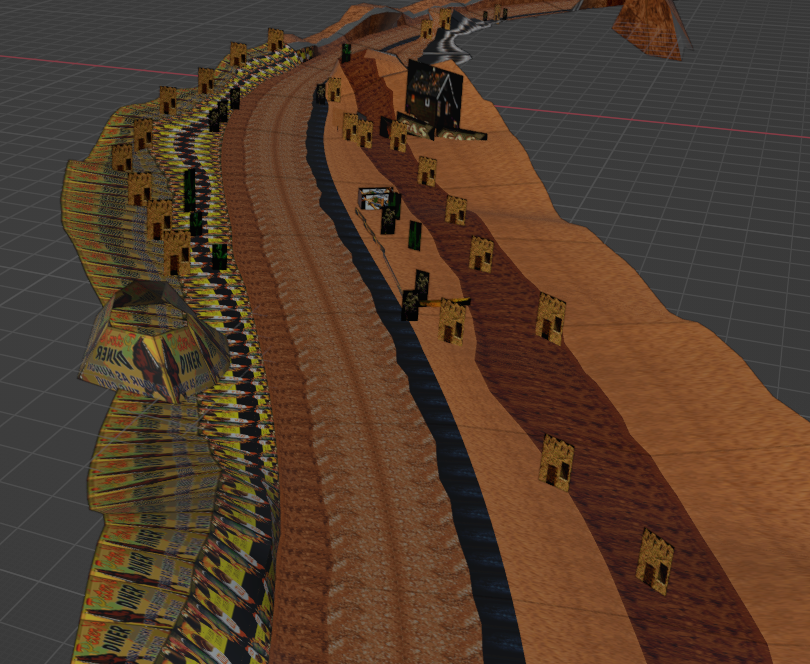
But, where is my textures?
Well, at first, they are there! At second, you have to enable the viewport texture mode
Third, they will look odd, or I totally cannot remember the rusty springs scenery decorated in tons of advertising papers
I think that is due to an offset between the numbers in the original QFS file and the export process, but till now I was not able to figure that out.
Anyway, for my personal futher process, the original texture are not really mattering.
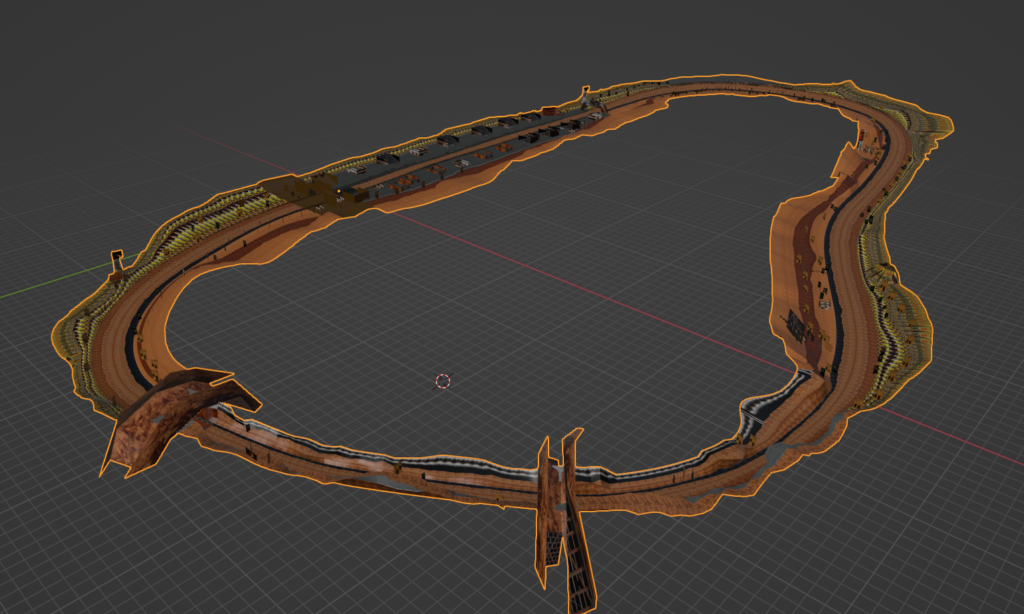
So, for me, the next step is uniting the single blocks to one single mesh, in blender you can just press the A-key, and then CTRL+J, and you got one single mesh.
By the way, you can downlod the Rusty Springs blend-files (blocks and united) right here, together with the exported LWO and BMP textures as a zip-package.
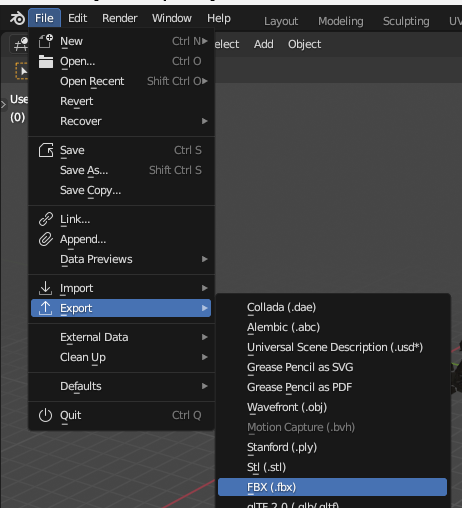
Step 4 – Export the Mesh
Right now it is time to export the mesh – for me, I choose the .fbx file for further usage, but your choice might be different depending on what you want to do next.
Step 5 – Further processing
This step is totally individual – I will process the file I created within the unreal engine, you keep reading here.